 Coming in different thicknesses and material, in general road tires are thinner and allow you to roll at a faster speeds with lesser rolling resistance.
Tires have gone through plenty of development since their initial use plenty of years ago. The three types of tire systems used today are clinchers, tubular and tubeless tires. In our Wheels & Tires post, we will cover tips on clincher tires as they are most commonly used in all types of riding. Clincher tires have a wire bead that holds their shape and fits in a hook on the rim to hold them in place.
Listed below are a few things you should take note of in order to maintain the condition of your road tires and also a quick guide to how you can replace a punctured inner tube.
Good Tire Pressure
Well inflated tires are important as they provide good traction and strong grip on the roads during riding. A well inflated tire will also eliminate and reduce the risk of punctures. Having a tire pressure that is too low will increase the chances of a pinch flat puncture and it may also cause damage to your rims.
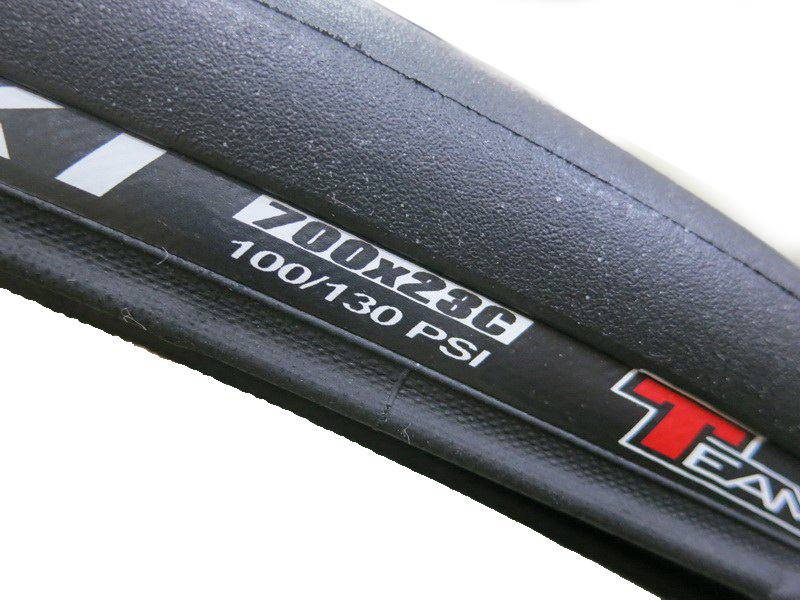
The recommended tire pressure for each tire is usually written on the tire. Try not to deviate from this range too much even though there is no exact specified value. The units PSI, stand for pounds per square inch. Some tires may have their pressure limit written in Bar units.
As a general guideline, road tires will require 80 to 130 psi ; mountain tires 30 to 50 psi.
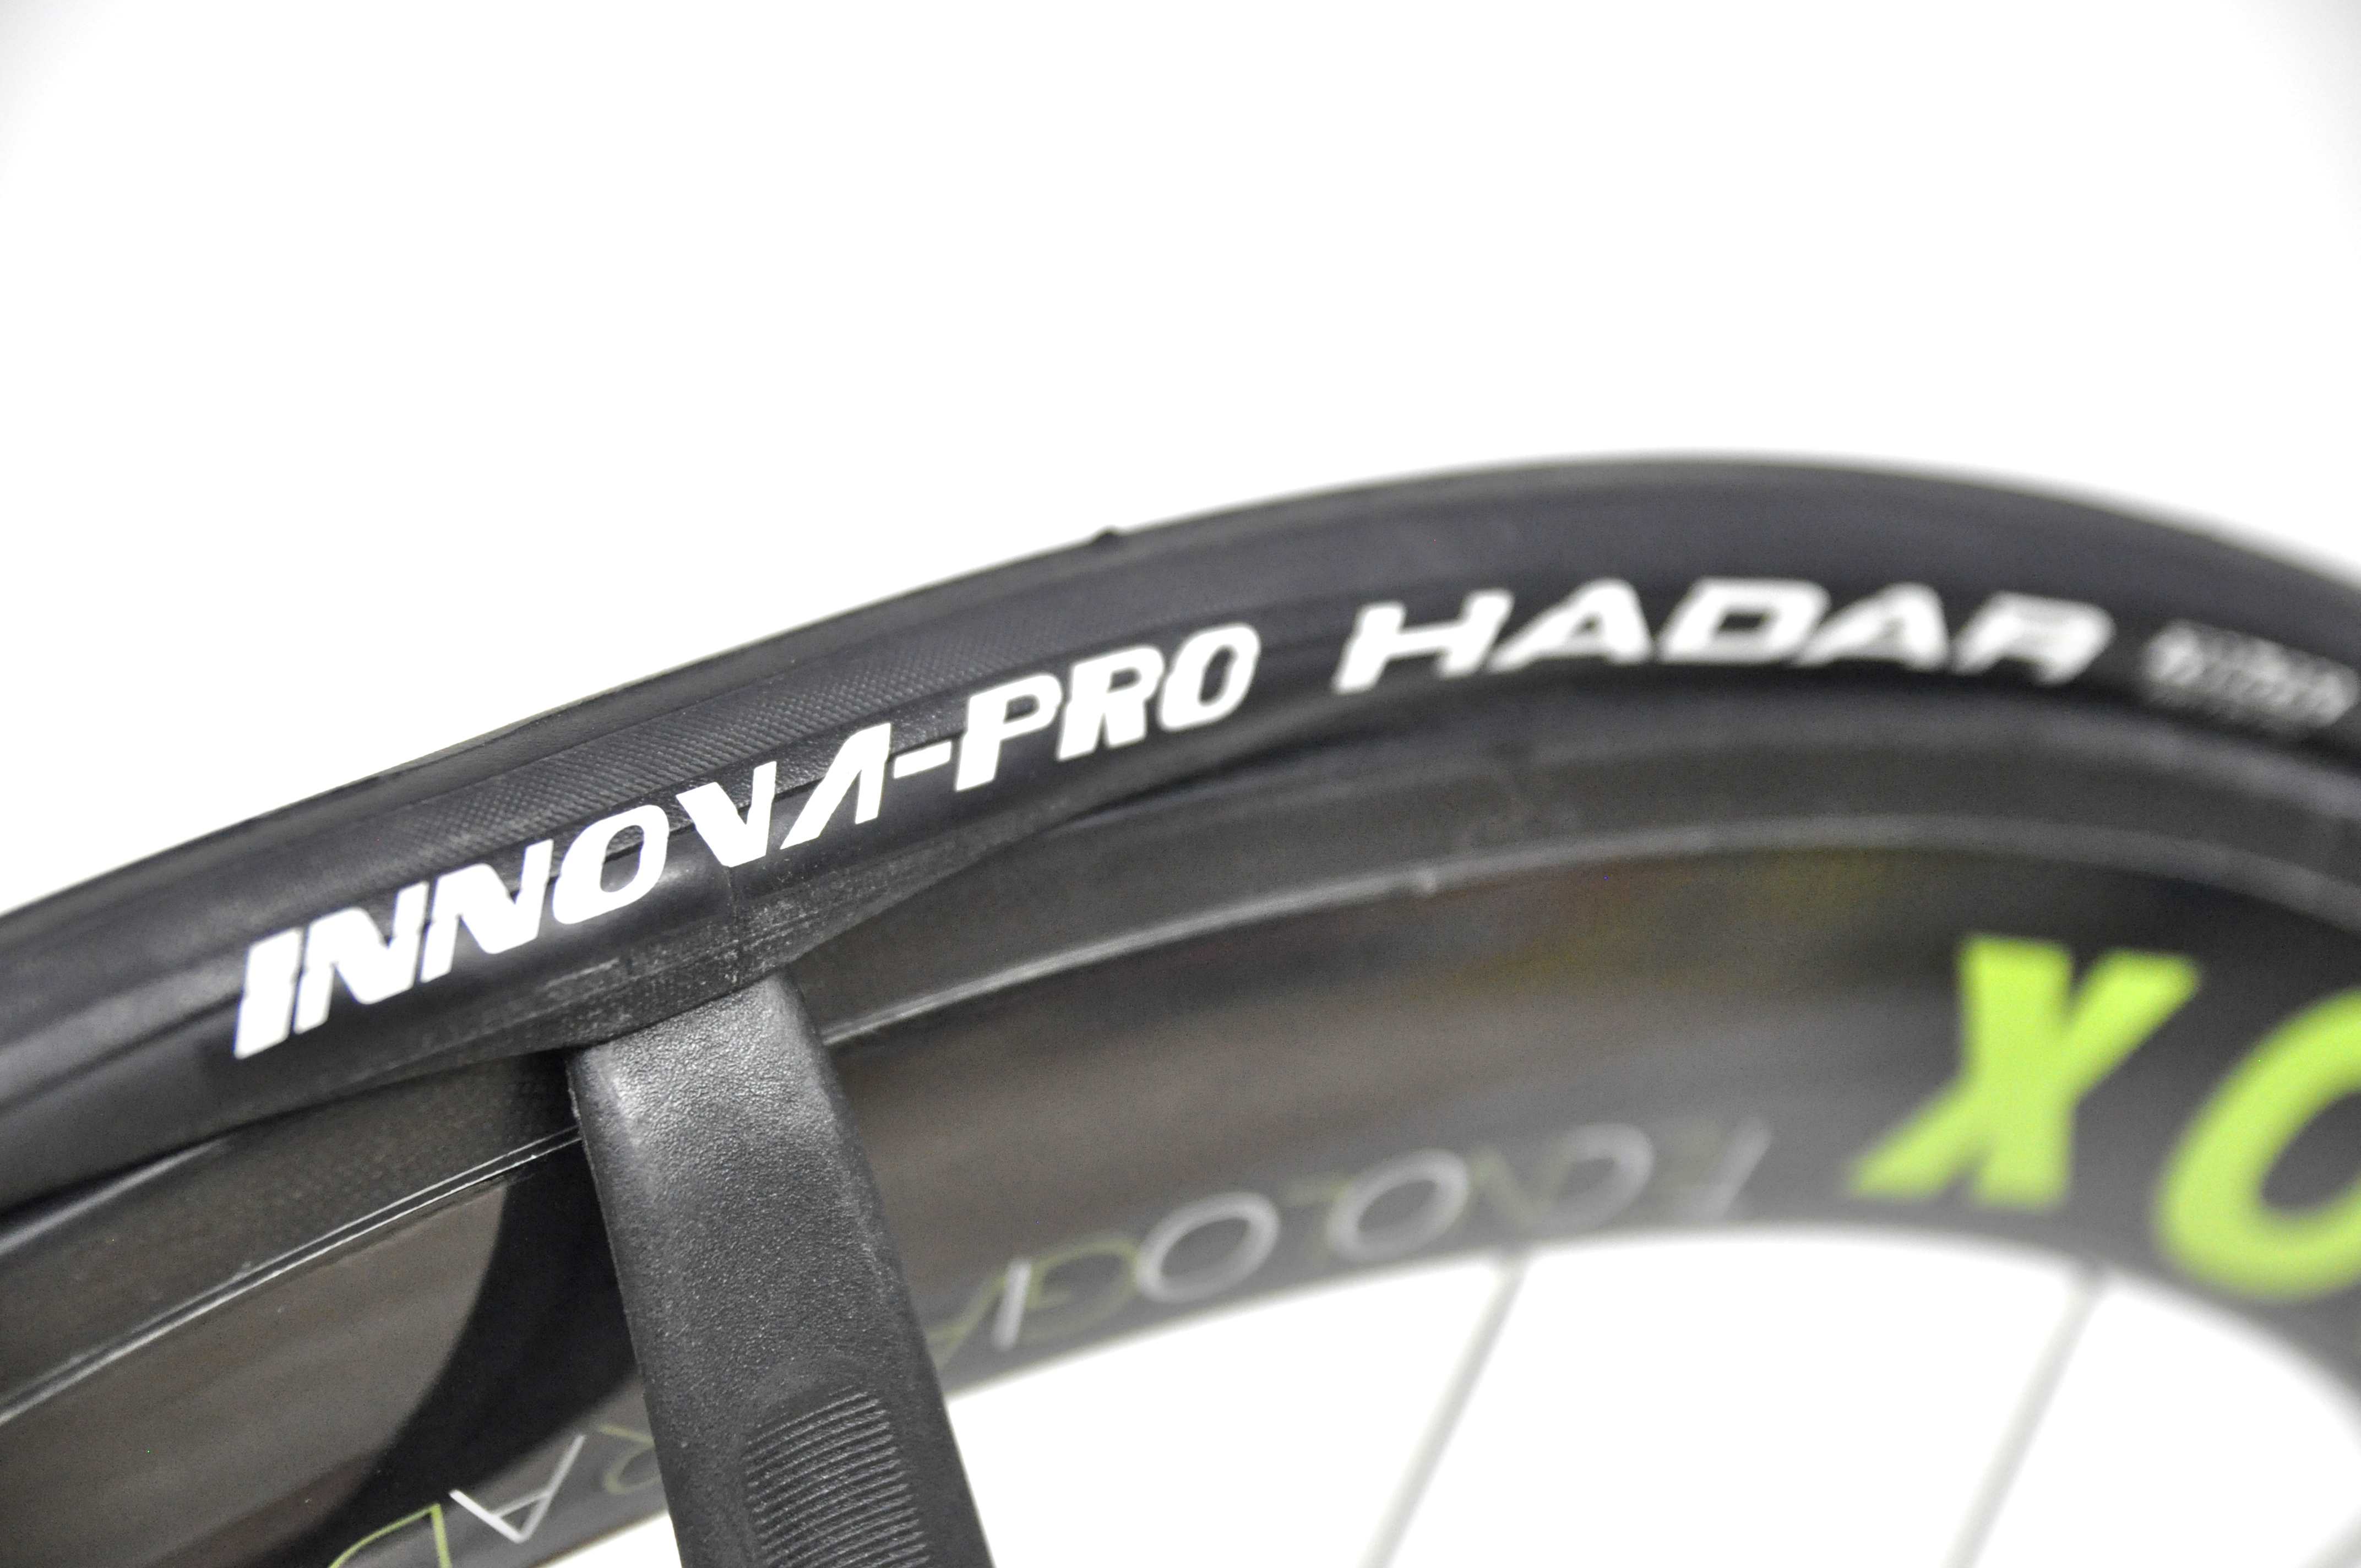
 The pressure limit (100 – 130 PSI) written on an Innova Pro Nunki Race tire, commonly used on the carbon racer bikes.
Inspecting for signs of wear
The lifespan and condition of tires will depend heavily on your frequency of use and also the terrain of your rides. Riding on over-worn tires with small tears or cuts can be dangerous and may lead to a higher risk of punctures while riding, that is why it is recommended to inspect your tires occasionally before and after every ride.
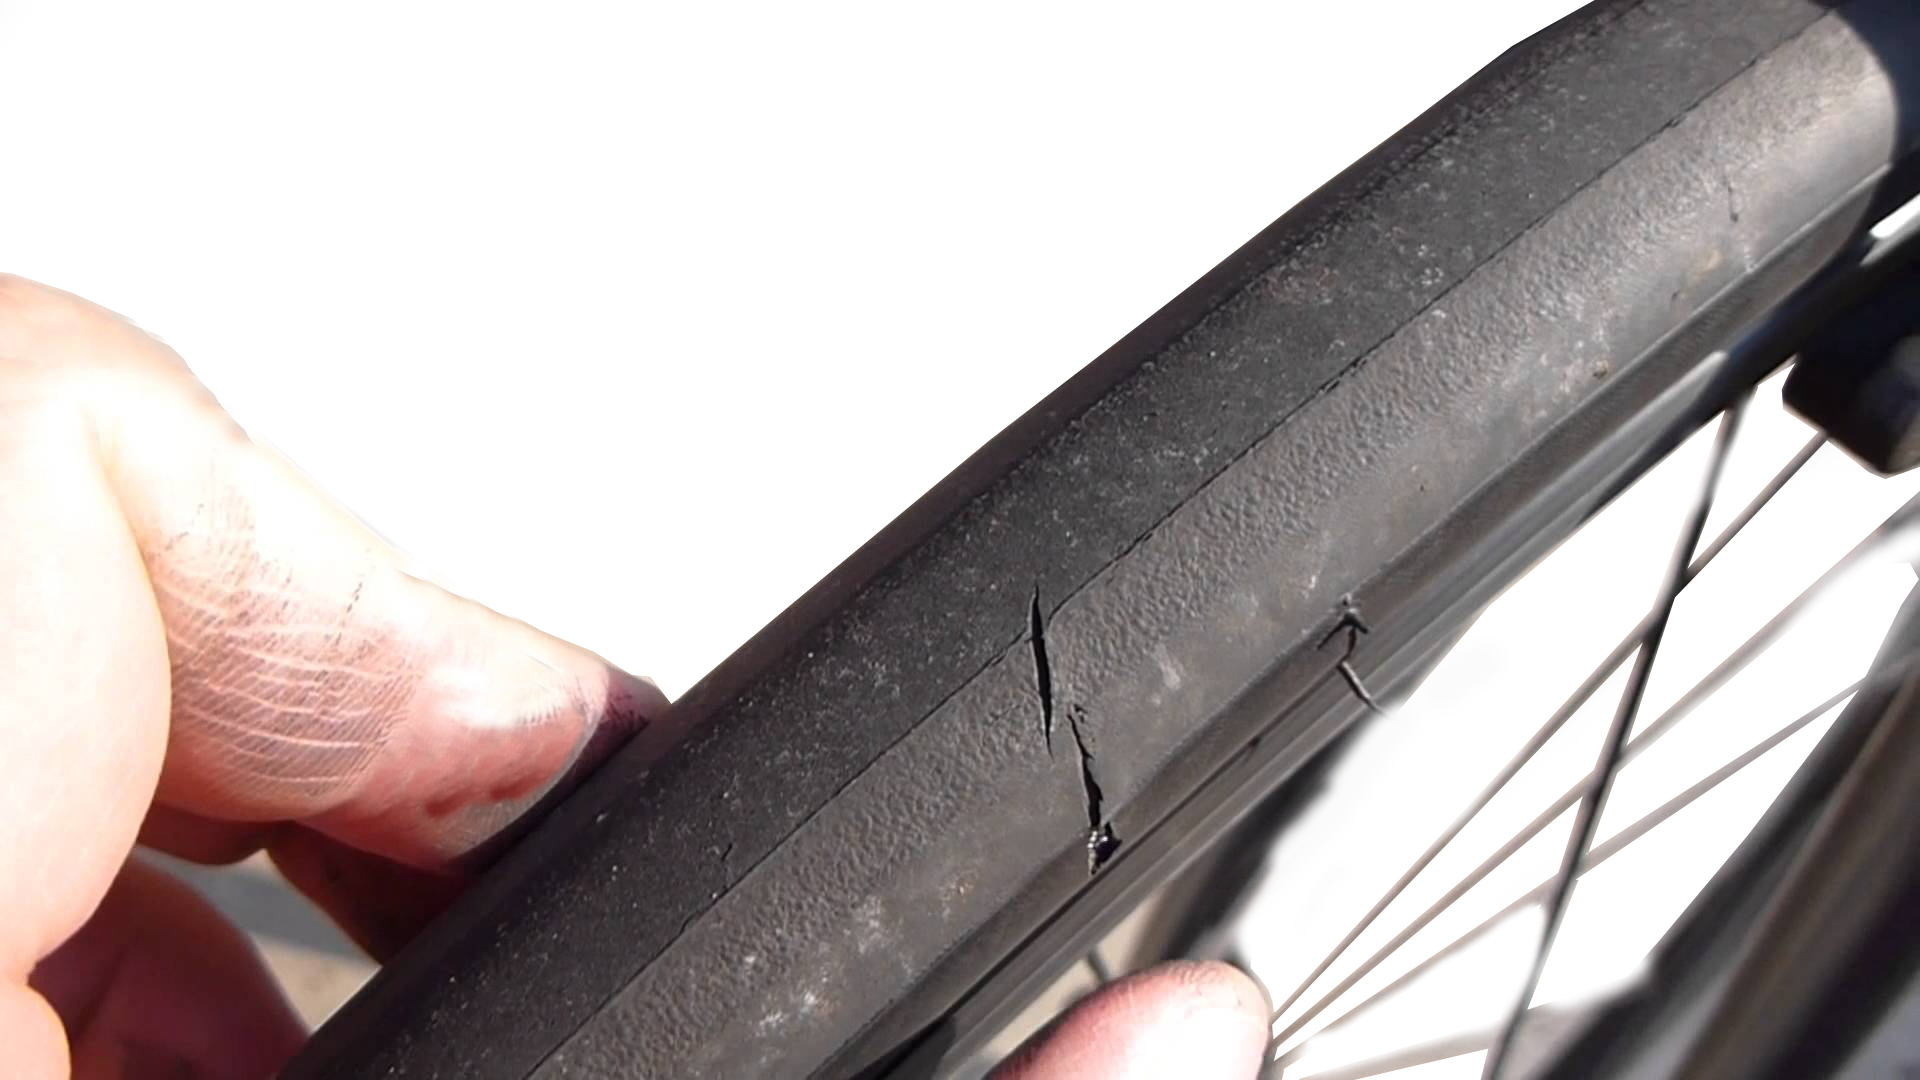
Small cuts and tears like these(above) may allow tiny road debris to enter and cut the inner tube, causing a puncture. When the tire thread patterns start to fade, this is also a sign to replace your tire as it starts to lose it’s grip.
Replacing a punctured inner tube
A tiny cut in the inner tube will slowly leak and become unusable for riding. Although patch kits are available (consist of a rubber sealant), when a puncture happens on the road, it is an essential skill to know how to remove and replace the inner tube of your bike wheel. All that is required are simple tools and the know-how:
Things you need:
– Tire Levers (A pair)
– A new inner tube
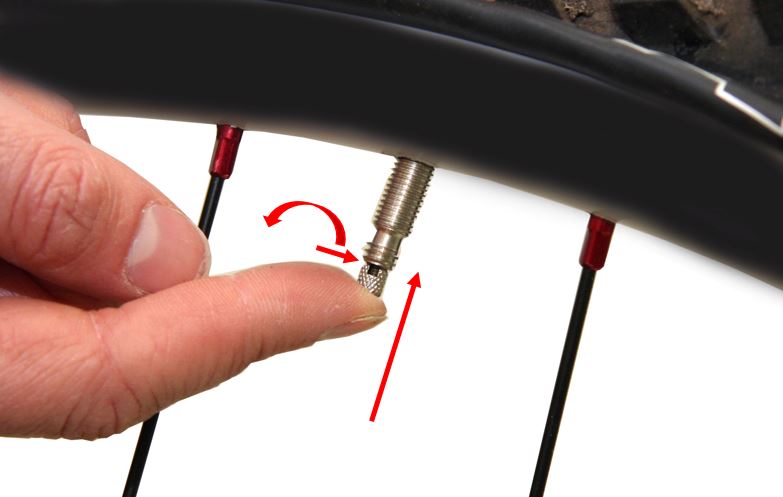
Step 1: Loosening the valve
Most road bike tubes will make use of a Presta Valve. Presta valves have an extra bolt that locks and prevents air from escaping. First remove the tire cap of the valve by turning it anticlockwise. After removing the cap, turn the presta bolt anti clockwise to allow air to escape. (Remove the wheel off your bike so that it is easier to remove the tube)
Press downward on the presta valve to allow the tire to deflate completely. This will make it easier to remove the tire and tubing later on.
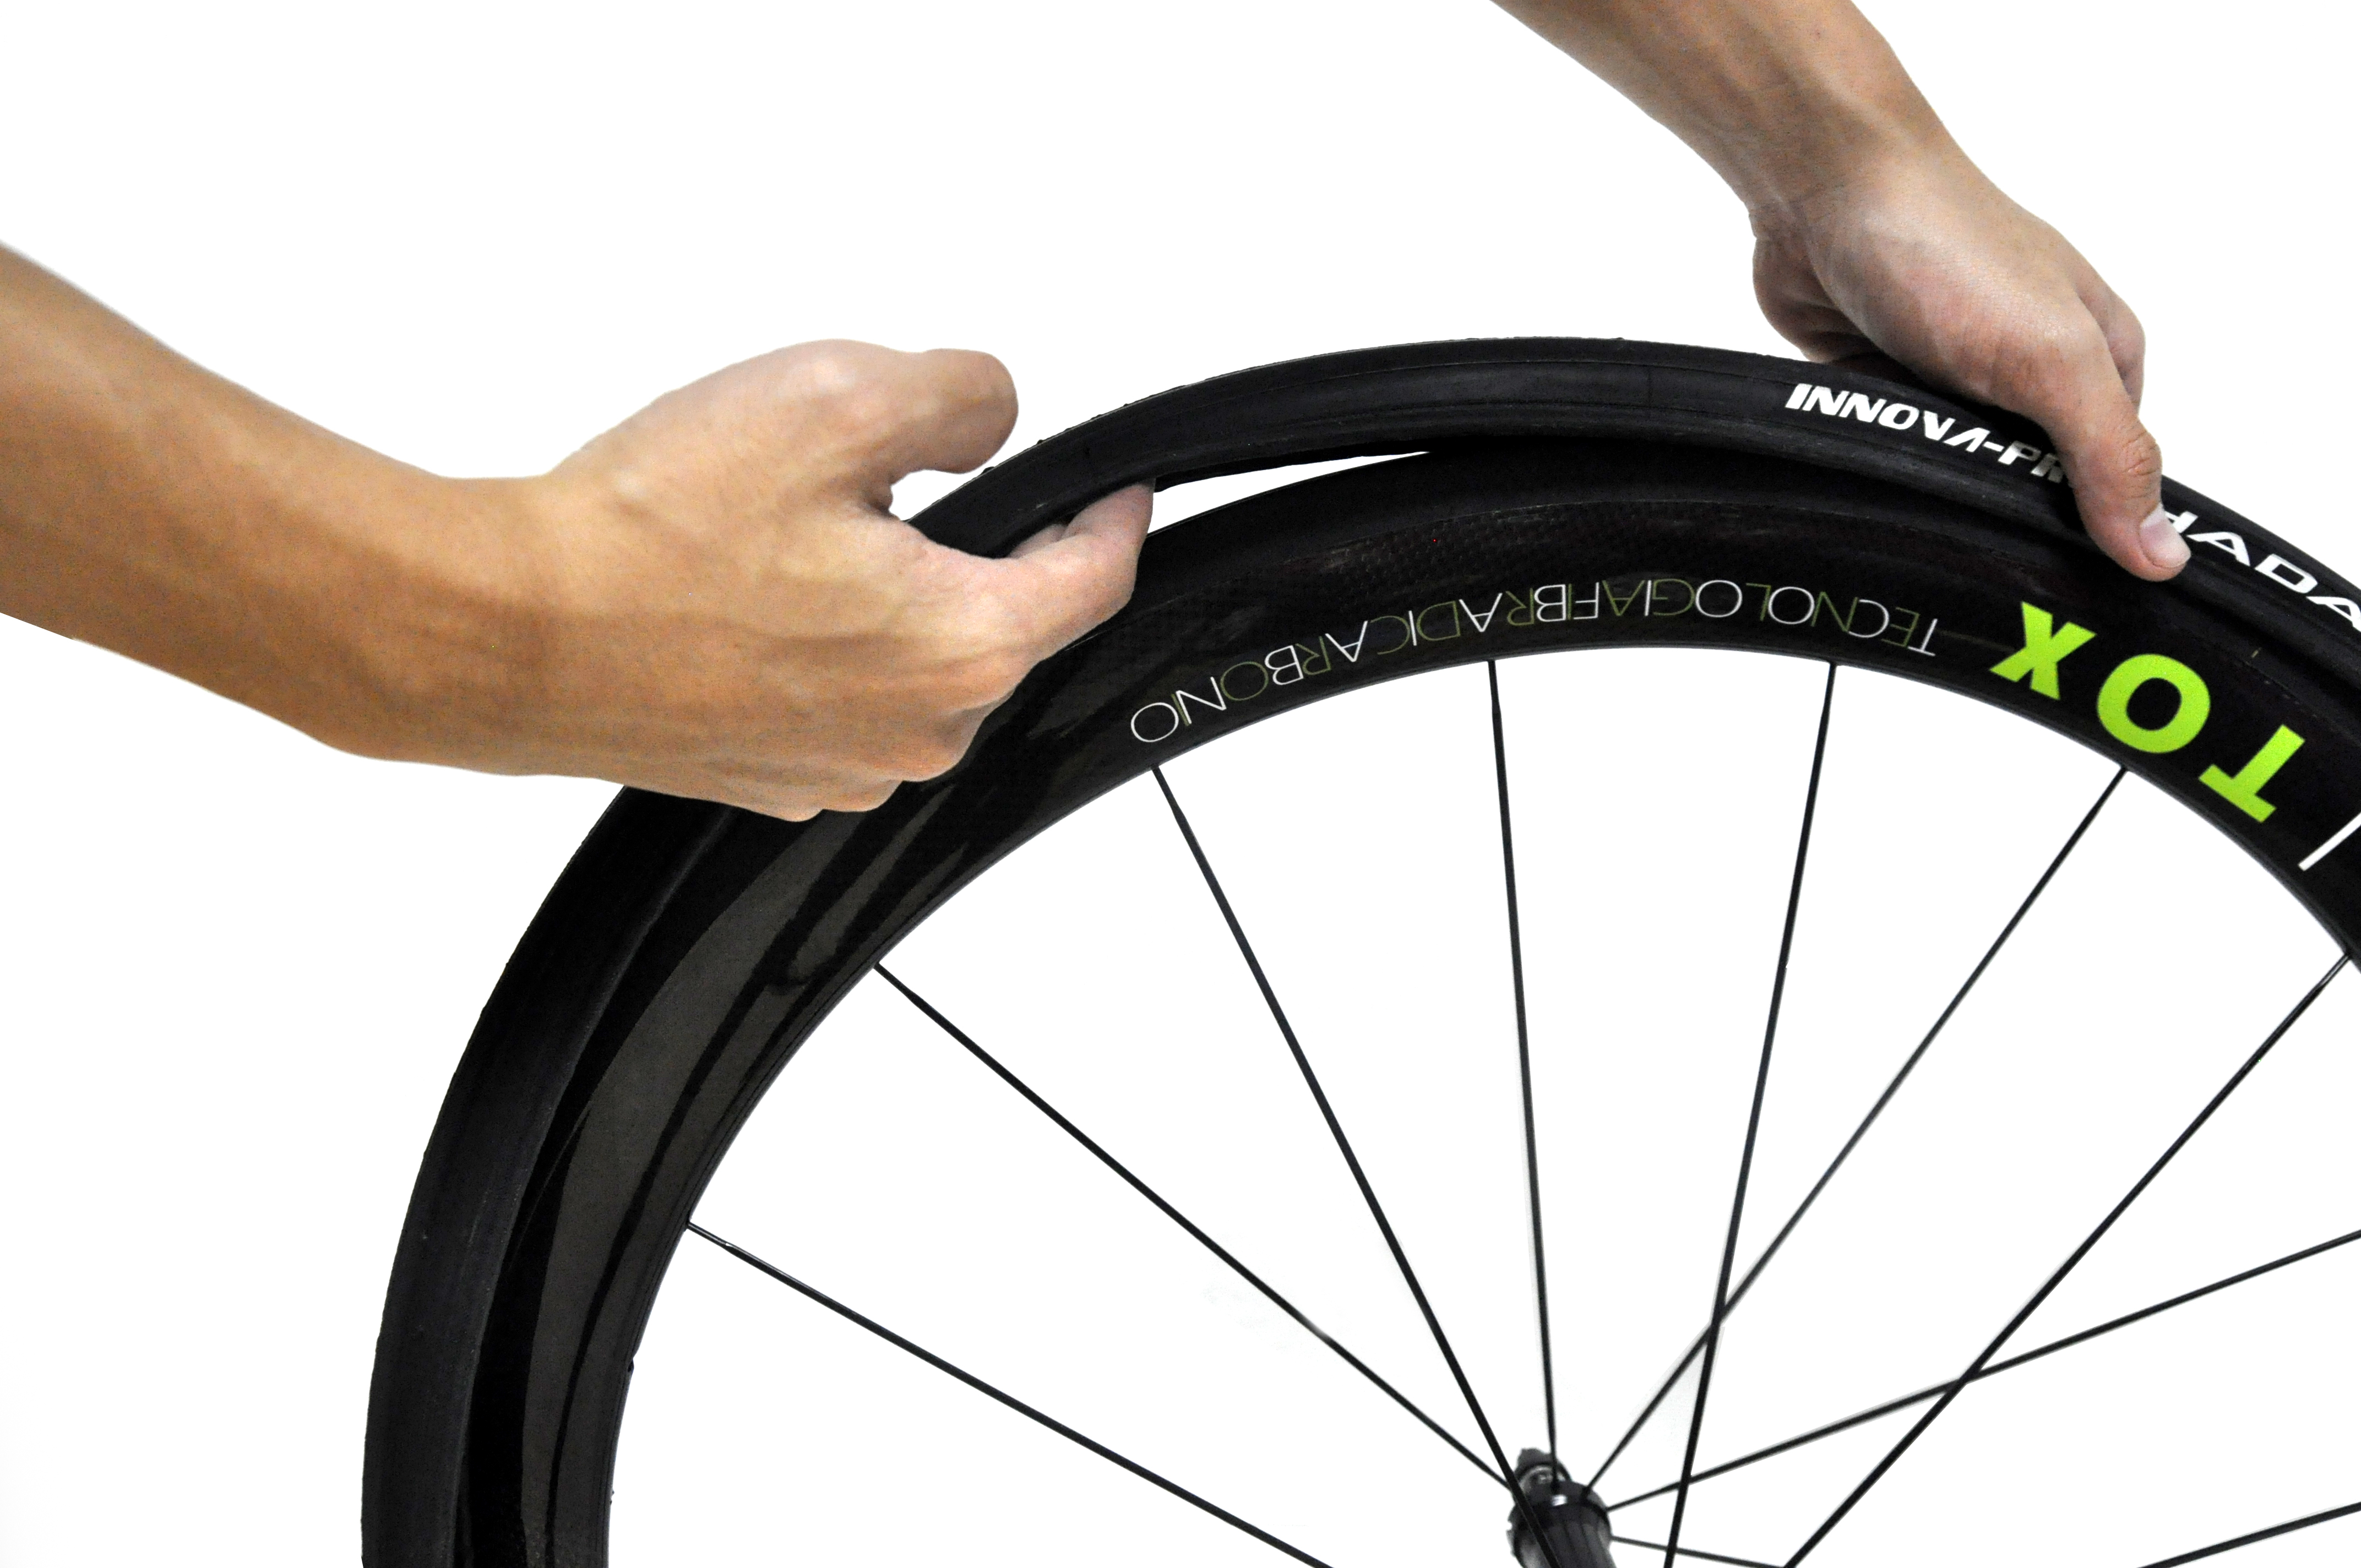
Step 2: Removing the outer tire
Once the tube is fully deflated, the outer tire is free moving and ready to be removed. The following steps may be tricky for first time users, but after practice, the use of tire levers will become second nature.
Push one of the tire levers into the rim and under the tire. With a ‘scooping’ action, pry the tire outwards and out of the rim.
 Scoop the tire out of the rim wall and hold the tire lever in place.
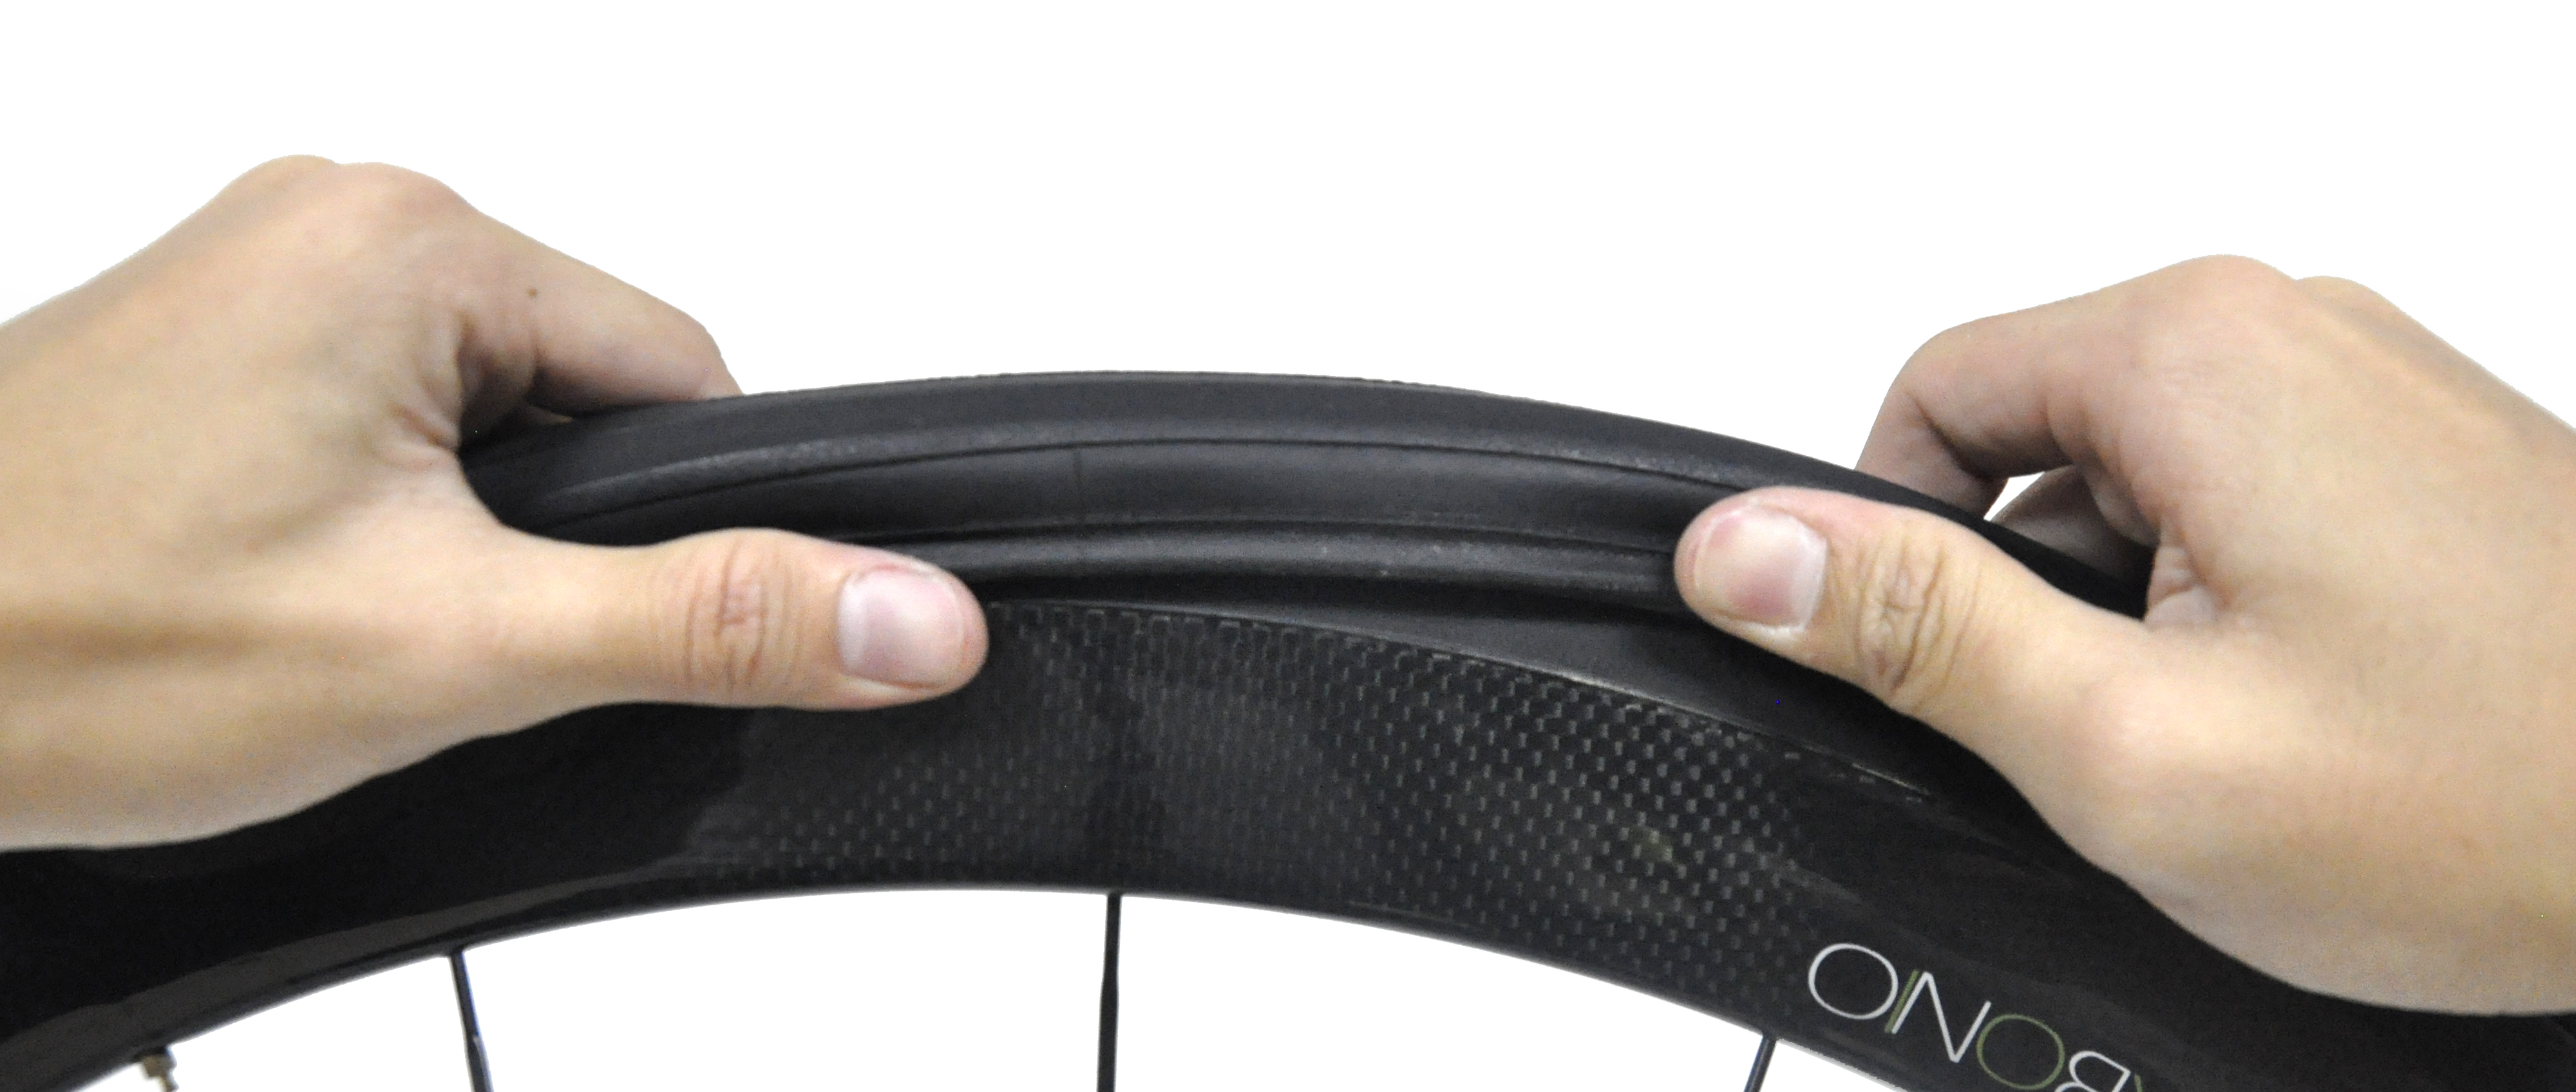
With one segment of the tire(first tire lever) off the rim, now use the second tire lever and do the same with another segment of the tire. Make sure the second tire lever is inserted near to the first lever.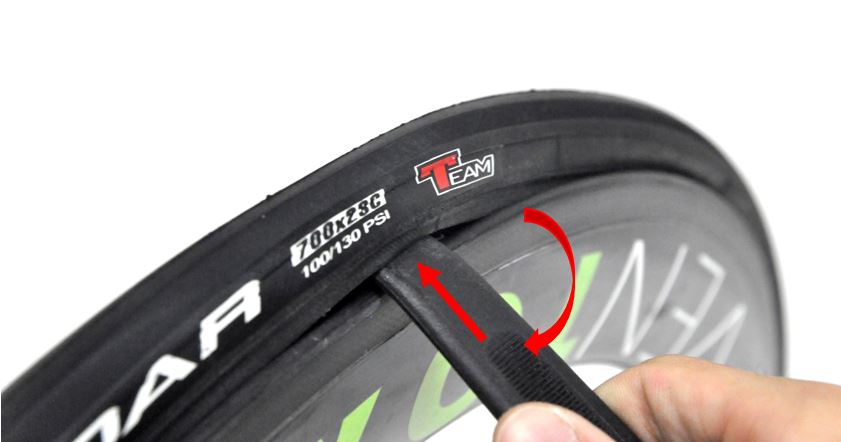
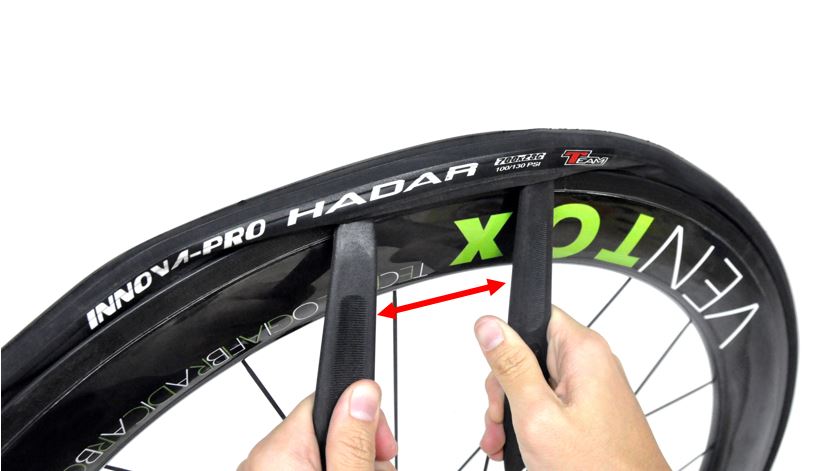
(Both tires levers held in place)
Next, hold the first tire lever firmly in place. (some tire levers may have a hook to hold onto the spokes). Push the second lever away from the first lever and around the entire circumference of the rim. This will force out and remove the rest of the tire. (This step may also require some force for tires that are well fitted.)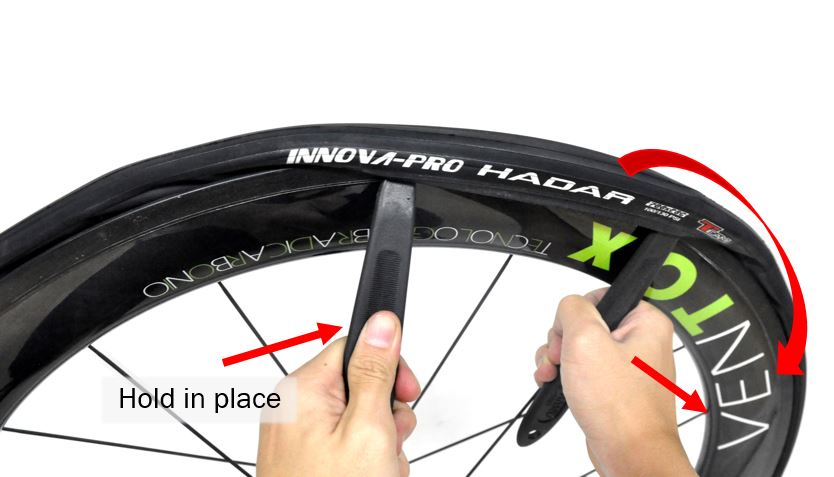
With half of the tire now seeded halfway out of the rim, remove the deflated inner tube from the wheel. Pull it upwards at the valve area and remove the rest from the rim.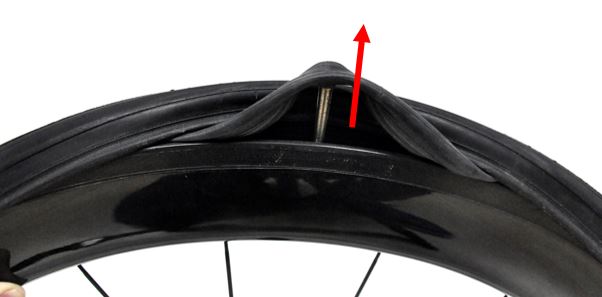

As an extra precaution, with the inner tube removed, take this time to inspect the inside of the tire for any cuts or sharp objects. To do so, run your hands (or a cloth) along the inside of the tire to remove any dirt or feel for any potential cuts.
3. Replacing a new inner tube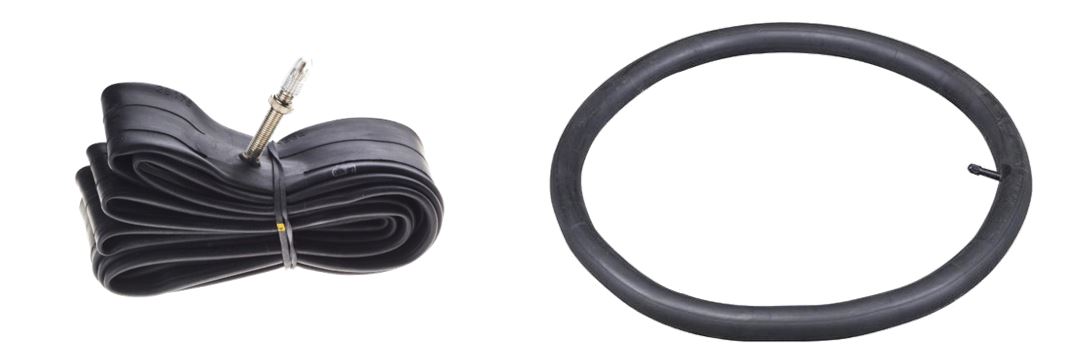 Ensure that your new inner tube is of the right size and circumference (700C for road tires). If you are using wheels with a high profile (deep aero wheels), make sure that the valve length of the inner tube is long enough to go through the entire rim.
Before inserting the new tube, inflate it slightly to give it some shape. This will make it easier to fit back into the tire. Insert the new tire valve into the hole in the rim, ensure that the valve enters and remains straight. 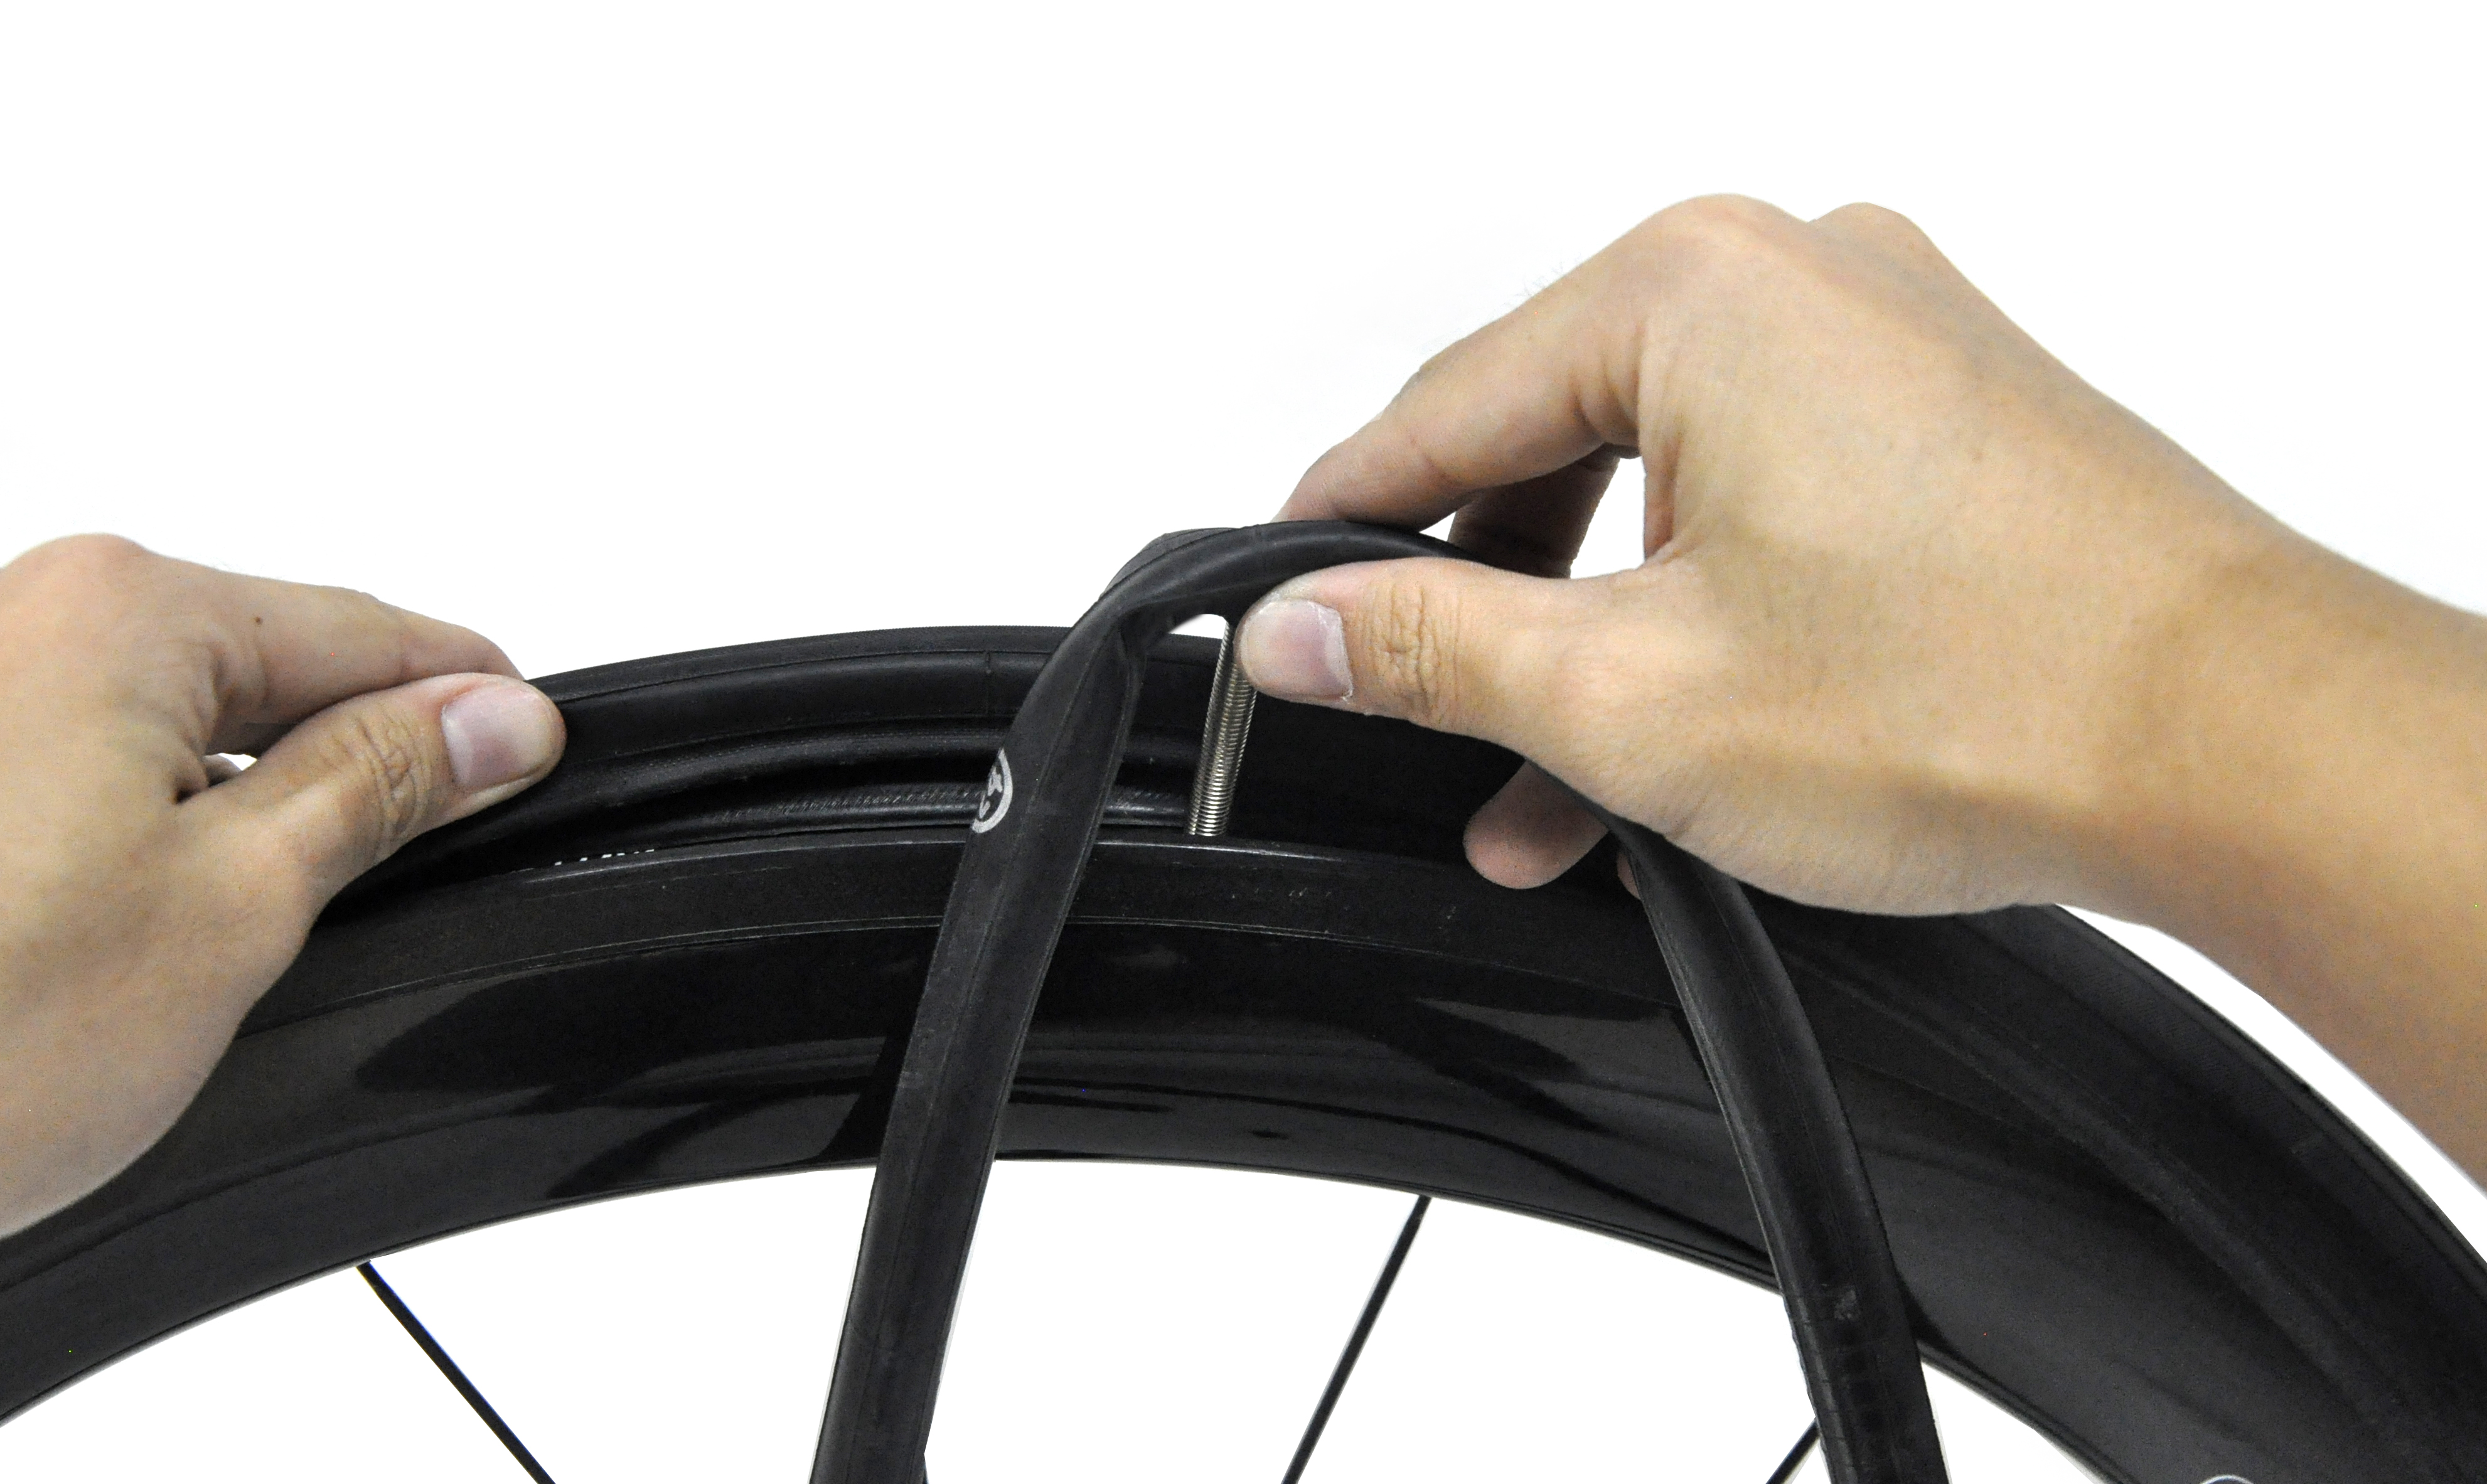
Fit the rest of the tube into the tire gradually and ensure that there are no bends or twisting of the inner tube.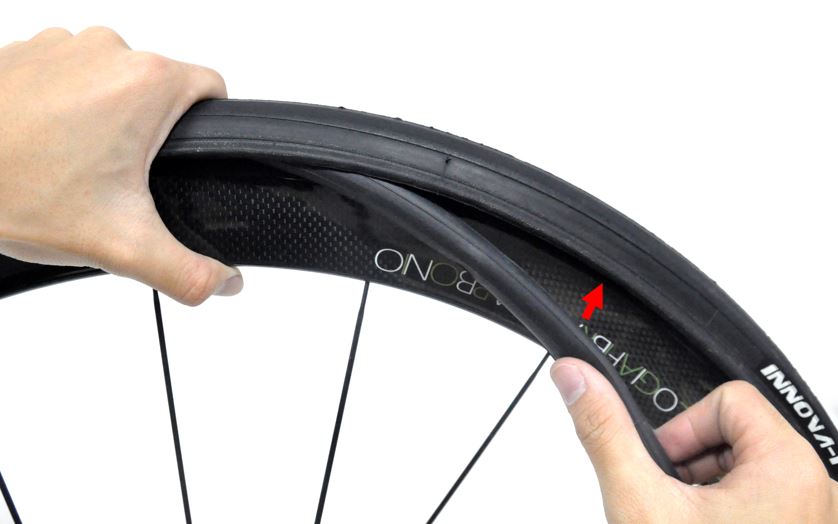
 This process is easier with some tire/rim combinations than others. Make sure that the tube is seeded in the middle of the tube and that it is not exposed or pinched by the outer tire.
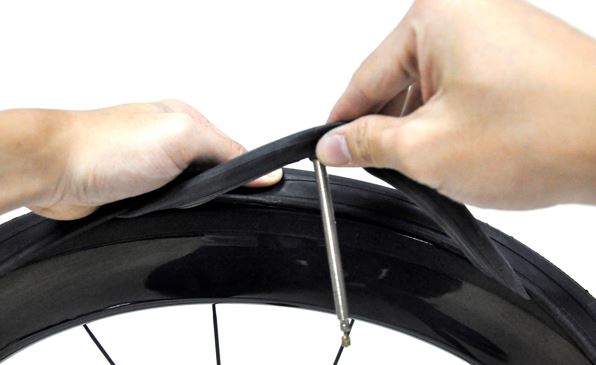
To get the last portion of the tyre back on the rim, you may use the tire levers the opposite way to push the tire bead into middle channel of rim and in place. This may require some strength for tires that are tighter.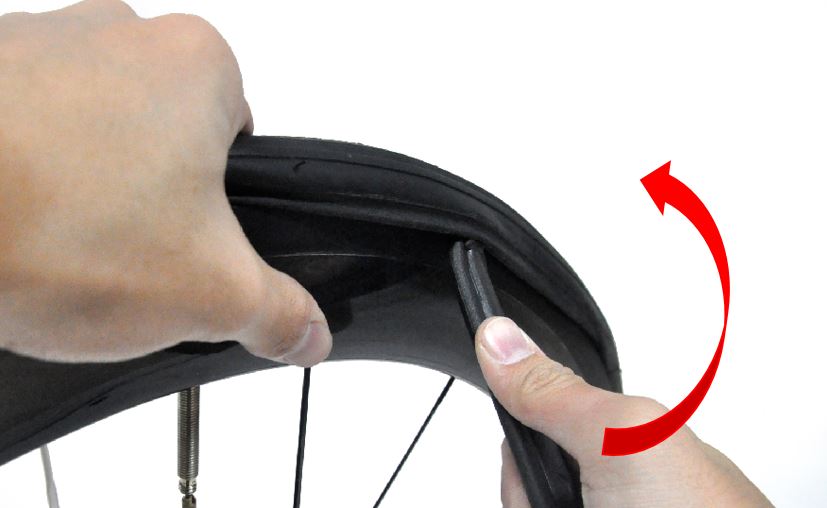
Once the tire is pushed back into the rim, inflate to the specified PSI range and check for any unevenness or hops on the tire surface. Tighten the Strada valve lock in place and place the valve cap back on the tire valve once inflated.
In conclusion, always remember to check your tire pressure, inspect your tires regularly and carry a spare tire kit with you when you ride! *Do note that it is normal for all tires to lose their pressure slightly after a few days (even without riding).
When riding on wet roads on rainy days, be more careful when cornering and brake earlier to avoid your tires skidding.