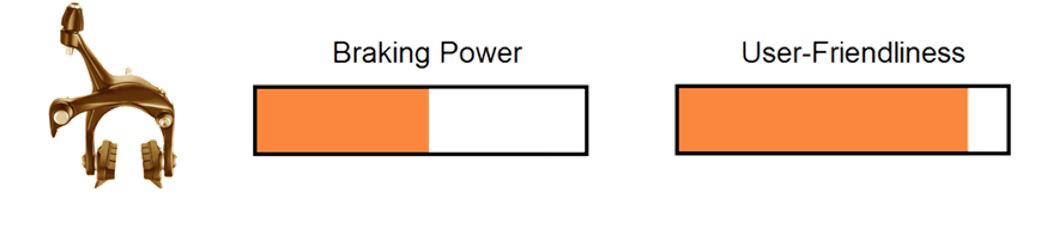
Caliper brakes are more commonly used on road bikes. They are self-contained mechanisms, attached to the bicycle’s frame by a single bolt for each brake, both front and rear. The arms reach downward from above the tire, and are long enough to get around the tire and reach the braking surface.
Caliper brakes are activated by cable tension and pull. They are relatively easier to adjust and tune, and are also more durable than conventional V-brakes.
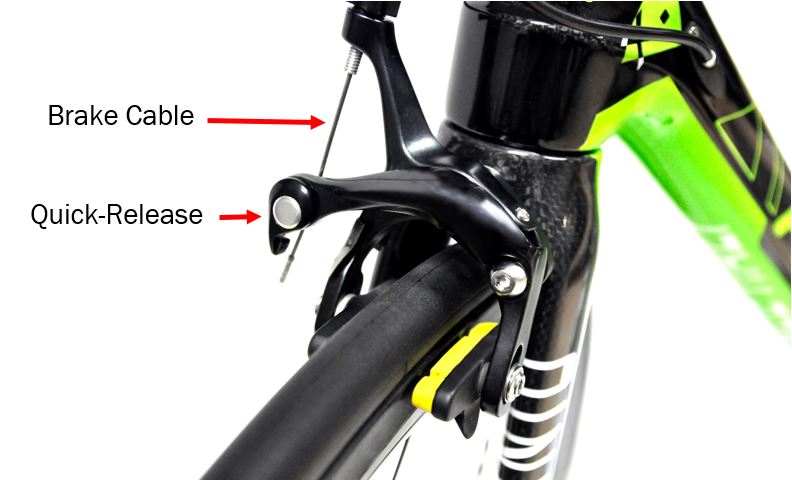
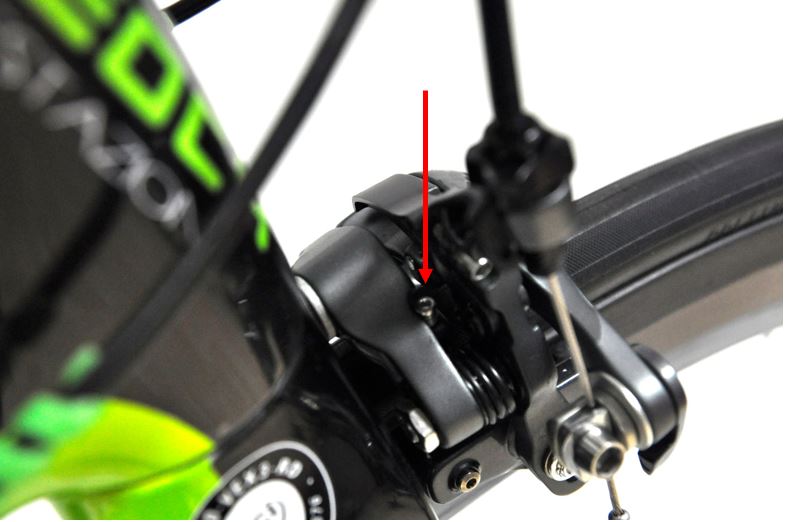
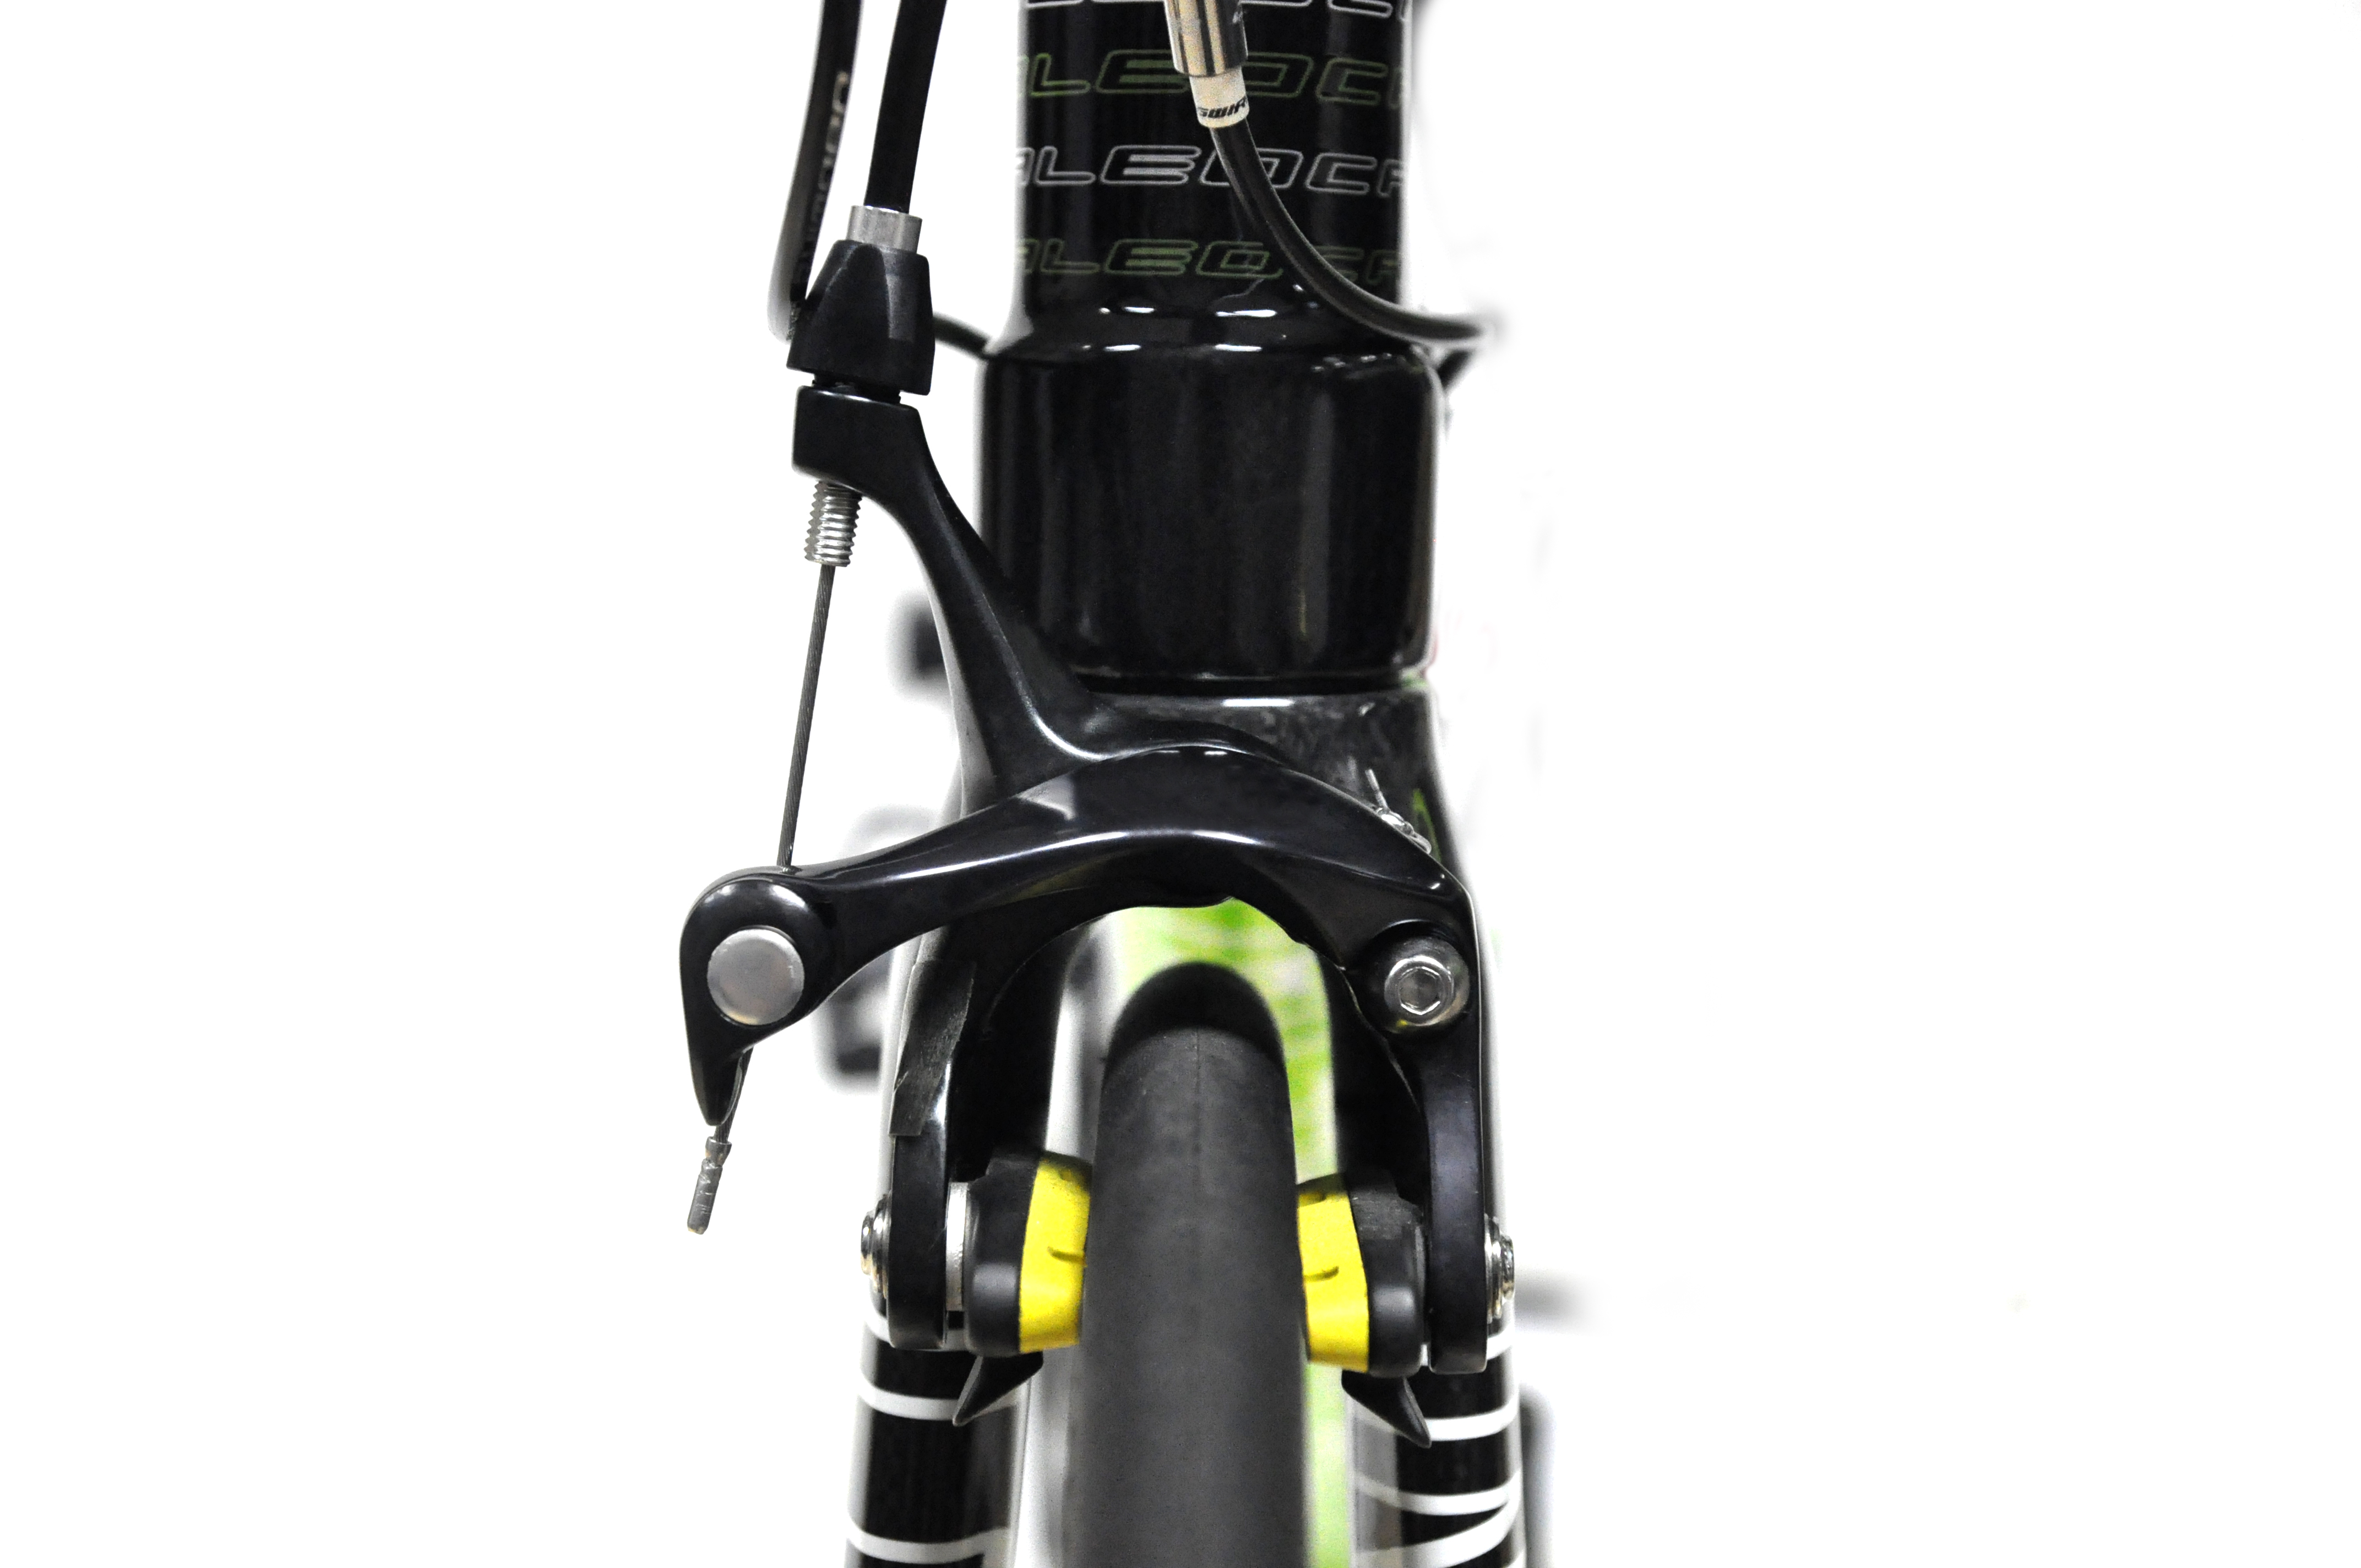 A front caliper brake on an Aleoca Carbon Vento Series bike
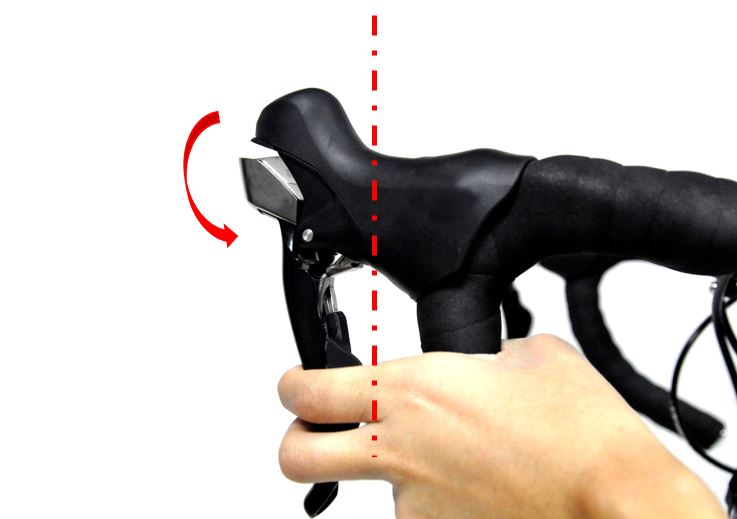
Caliper brakes can be linked to different types of brake lever systems. On high performance road bikes that use drop-style handlebars, the caliper brake levers are usually integrated with the gear shifters. Shown below is an integrated drop brake lever.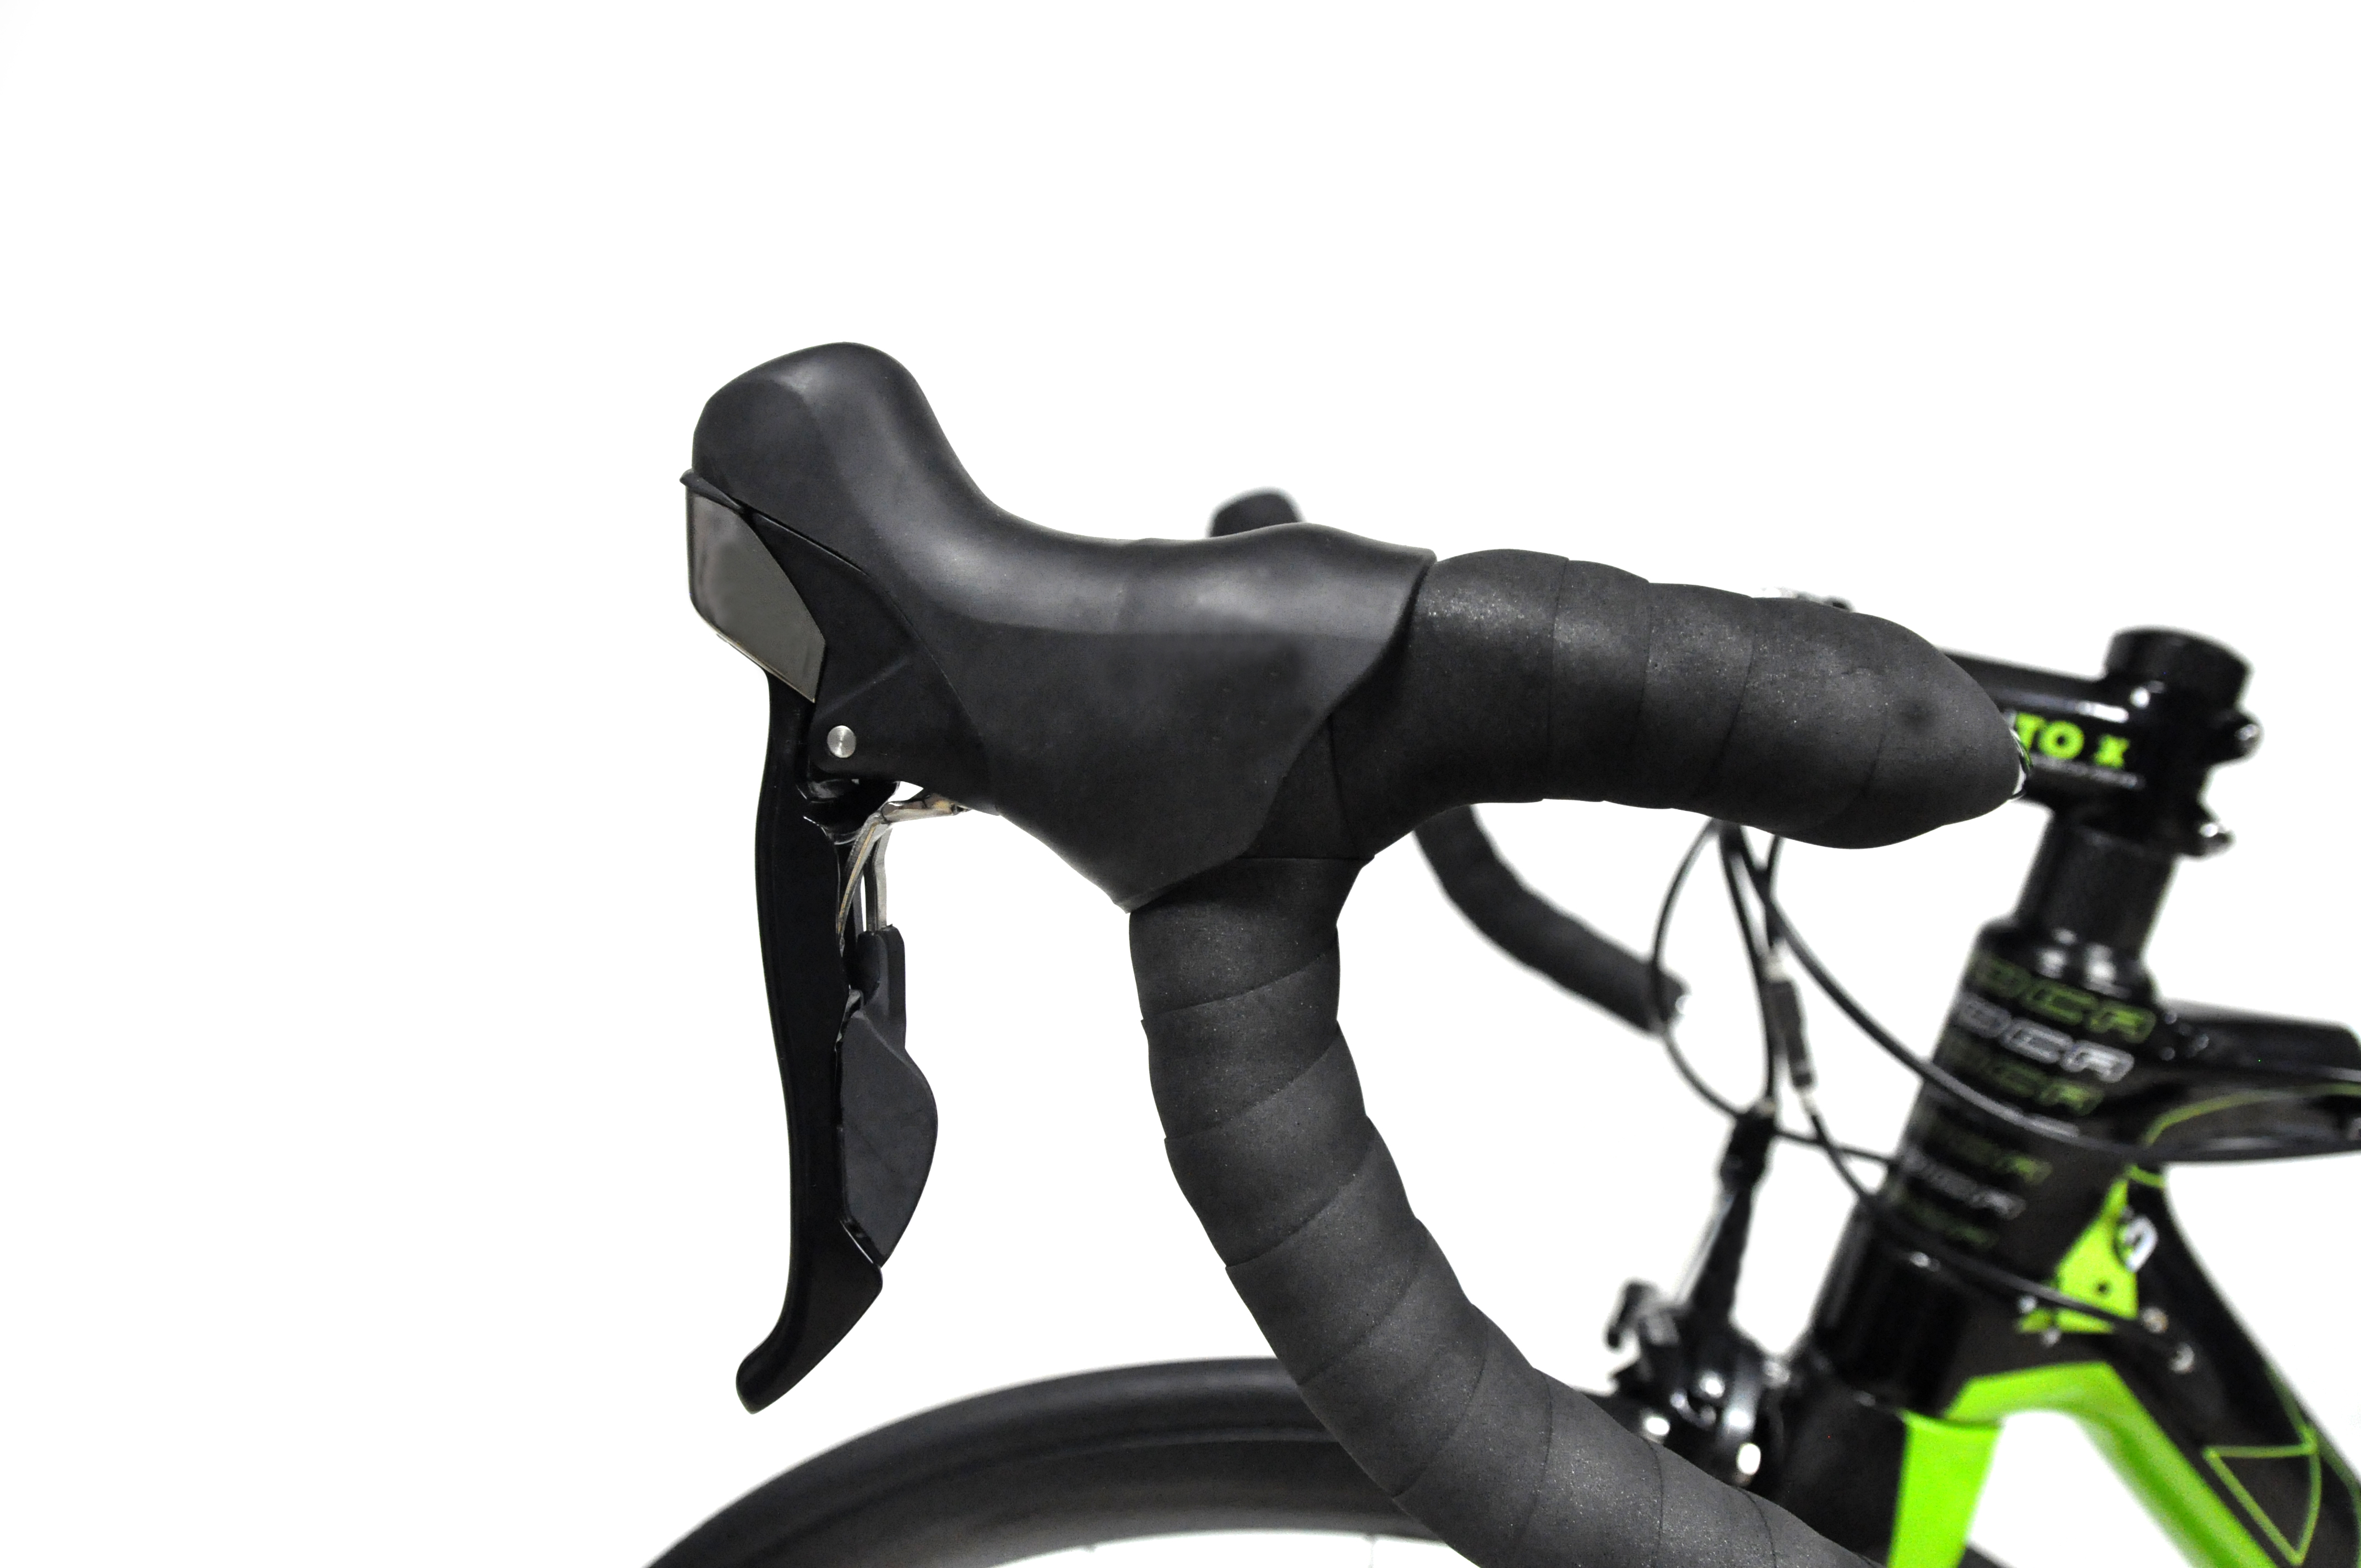 On hybrid road bicycles using flat handlebars, normal brake levers are usually used.
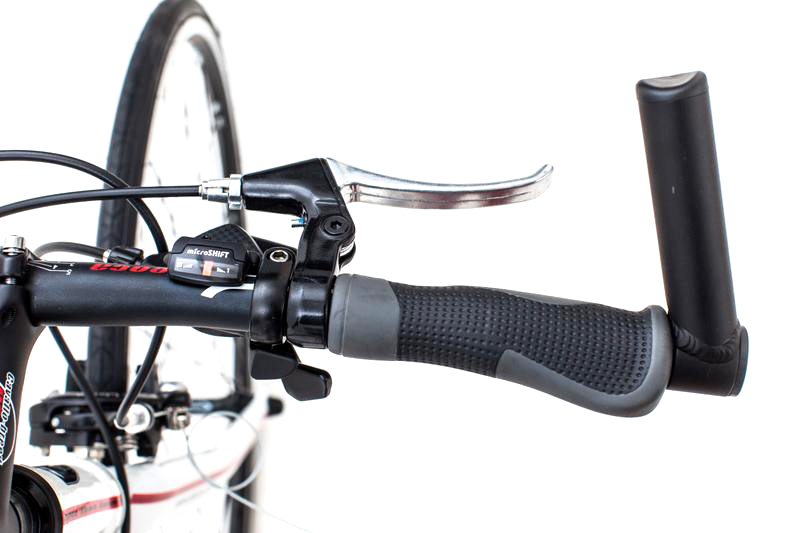
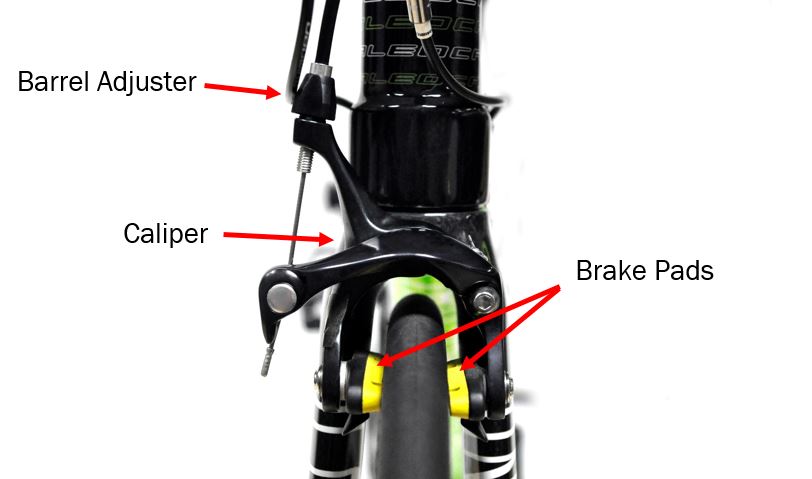
Parts of caliper brakes:
 The following guide will help with:
– Adjusting brake pad position
– Caliper Brakes loosing tension
– Centering Brakes
Step 1: Checking brake pad alignment
Before making adjustments to the caliper tension, first check the brake pad’s alignment with the rim.
Open the quick release lever of the caliper. This makes the caliper arms open wider and also allows you to remove the front wheel for other tuning purposes (wheel truing, cleaning etc.). Opening this release will provide you with more space to adjust the brake pads.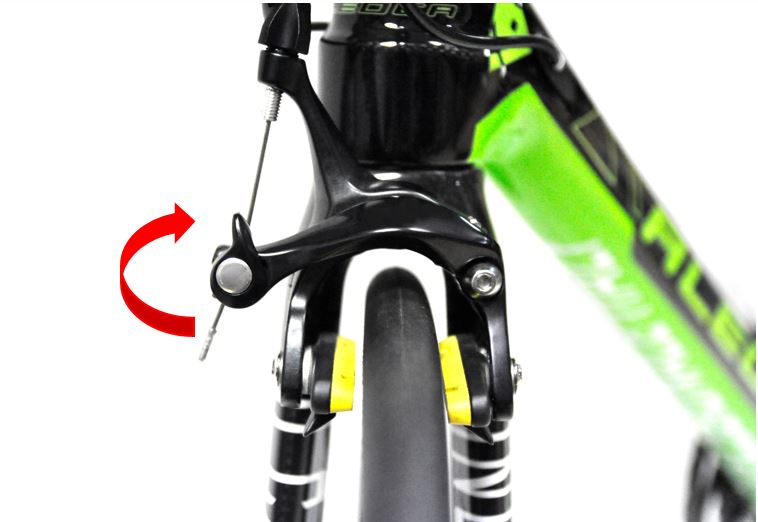 The image below shows a brake pad that is out of alignment and rubbing on the tire.
 To adjust the brake pad position, use an Allen key and turn the brake shoe bolt anticlockwise.
With the brake shoe bolt loosened, apply pressure to the brake arms onto the rim with support on both sides (so that rim does not lose center). After finding the right brake position, turn clockwise to pre tighten the brake shoe bolt.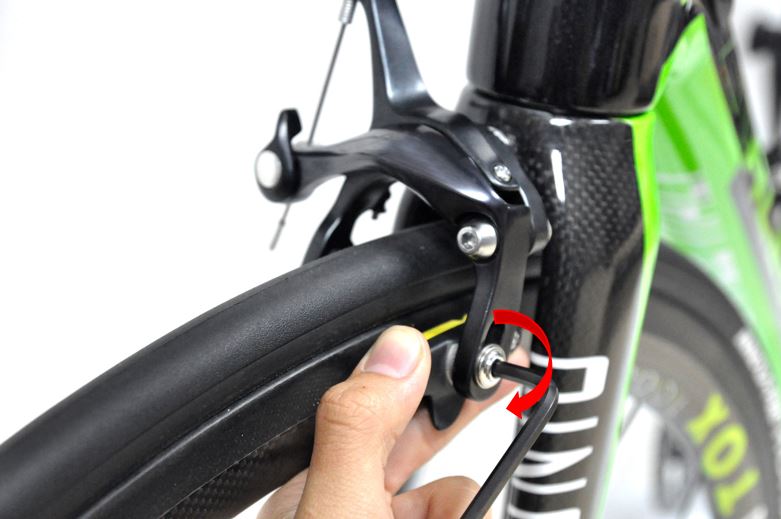 Hold the brake pad individually and tighten clockwise and ensure it does not shift during tightening. An aligned brake pad should look like this: Remember to close the quick release once adjustments have been complete.
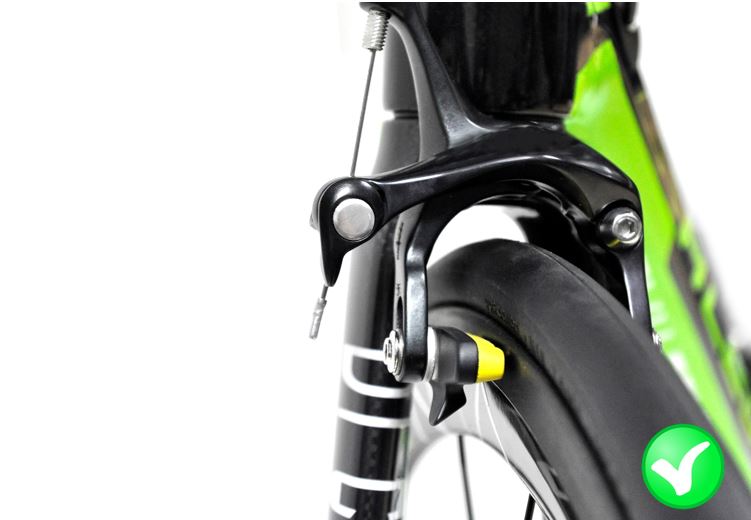
Step 2: Adjusting the cable tension
This step will allow you to make adjustments to increase the tension to make your brakes more sensitive.
For minor adjustments, tuning the barrel adjuster will be sufficient to tune the brakes.
For major adjustments (if brake levers must be depressed all the way), the tension is too lose and the cable wire needs to be pulled to make the brakes more effective.
Barrel Adjuster (Minor adjustment)
The barrel adjuster allows small tension adjustments to be made. It is usually found at the top of caliper brakes and is connected to the cable housing.
The barrel adjuster can be turned clockwise and anticlockwise to increase or decrease the cable tension.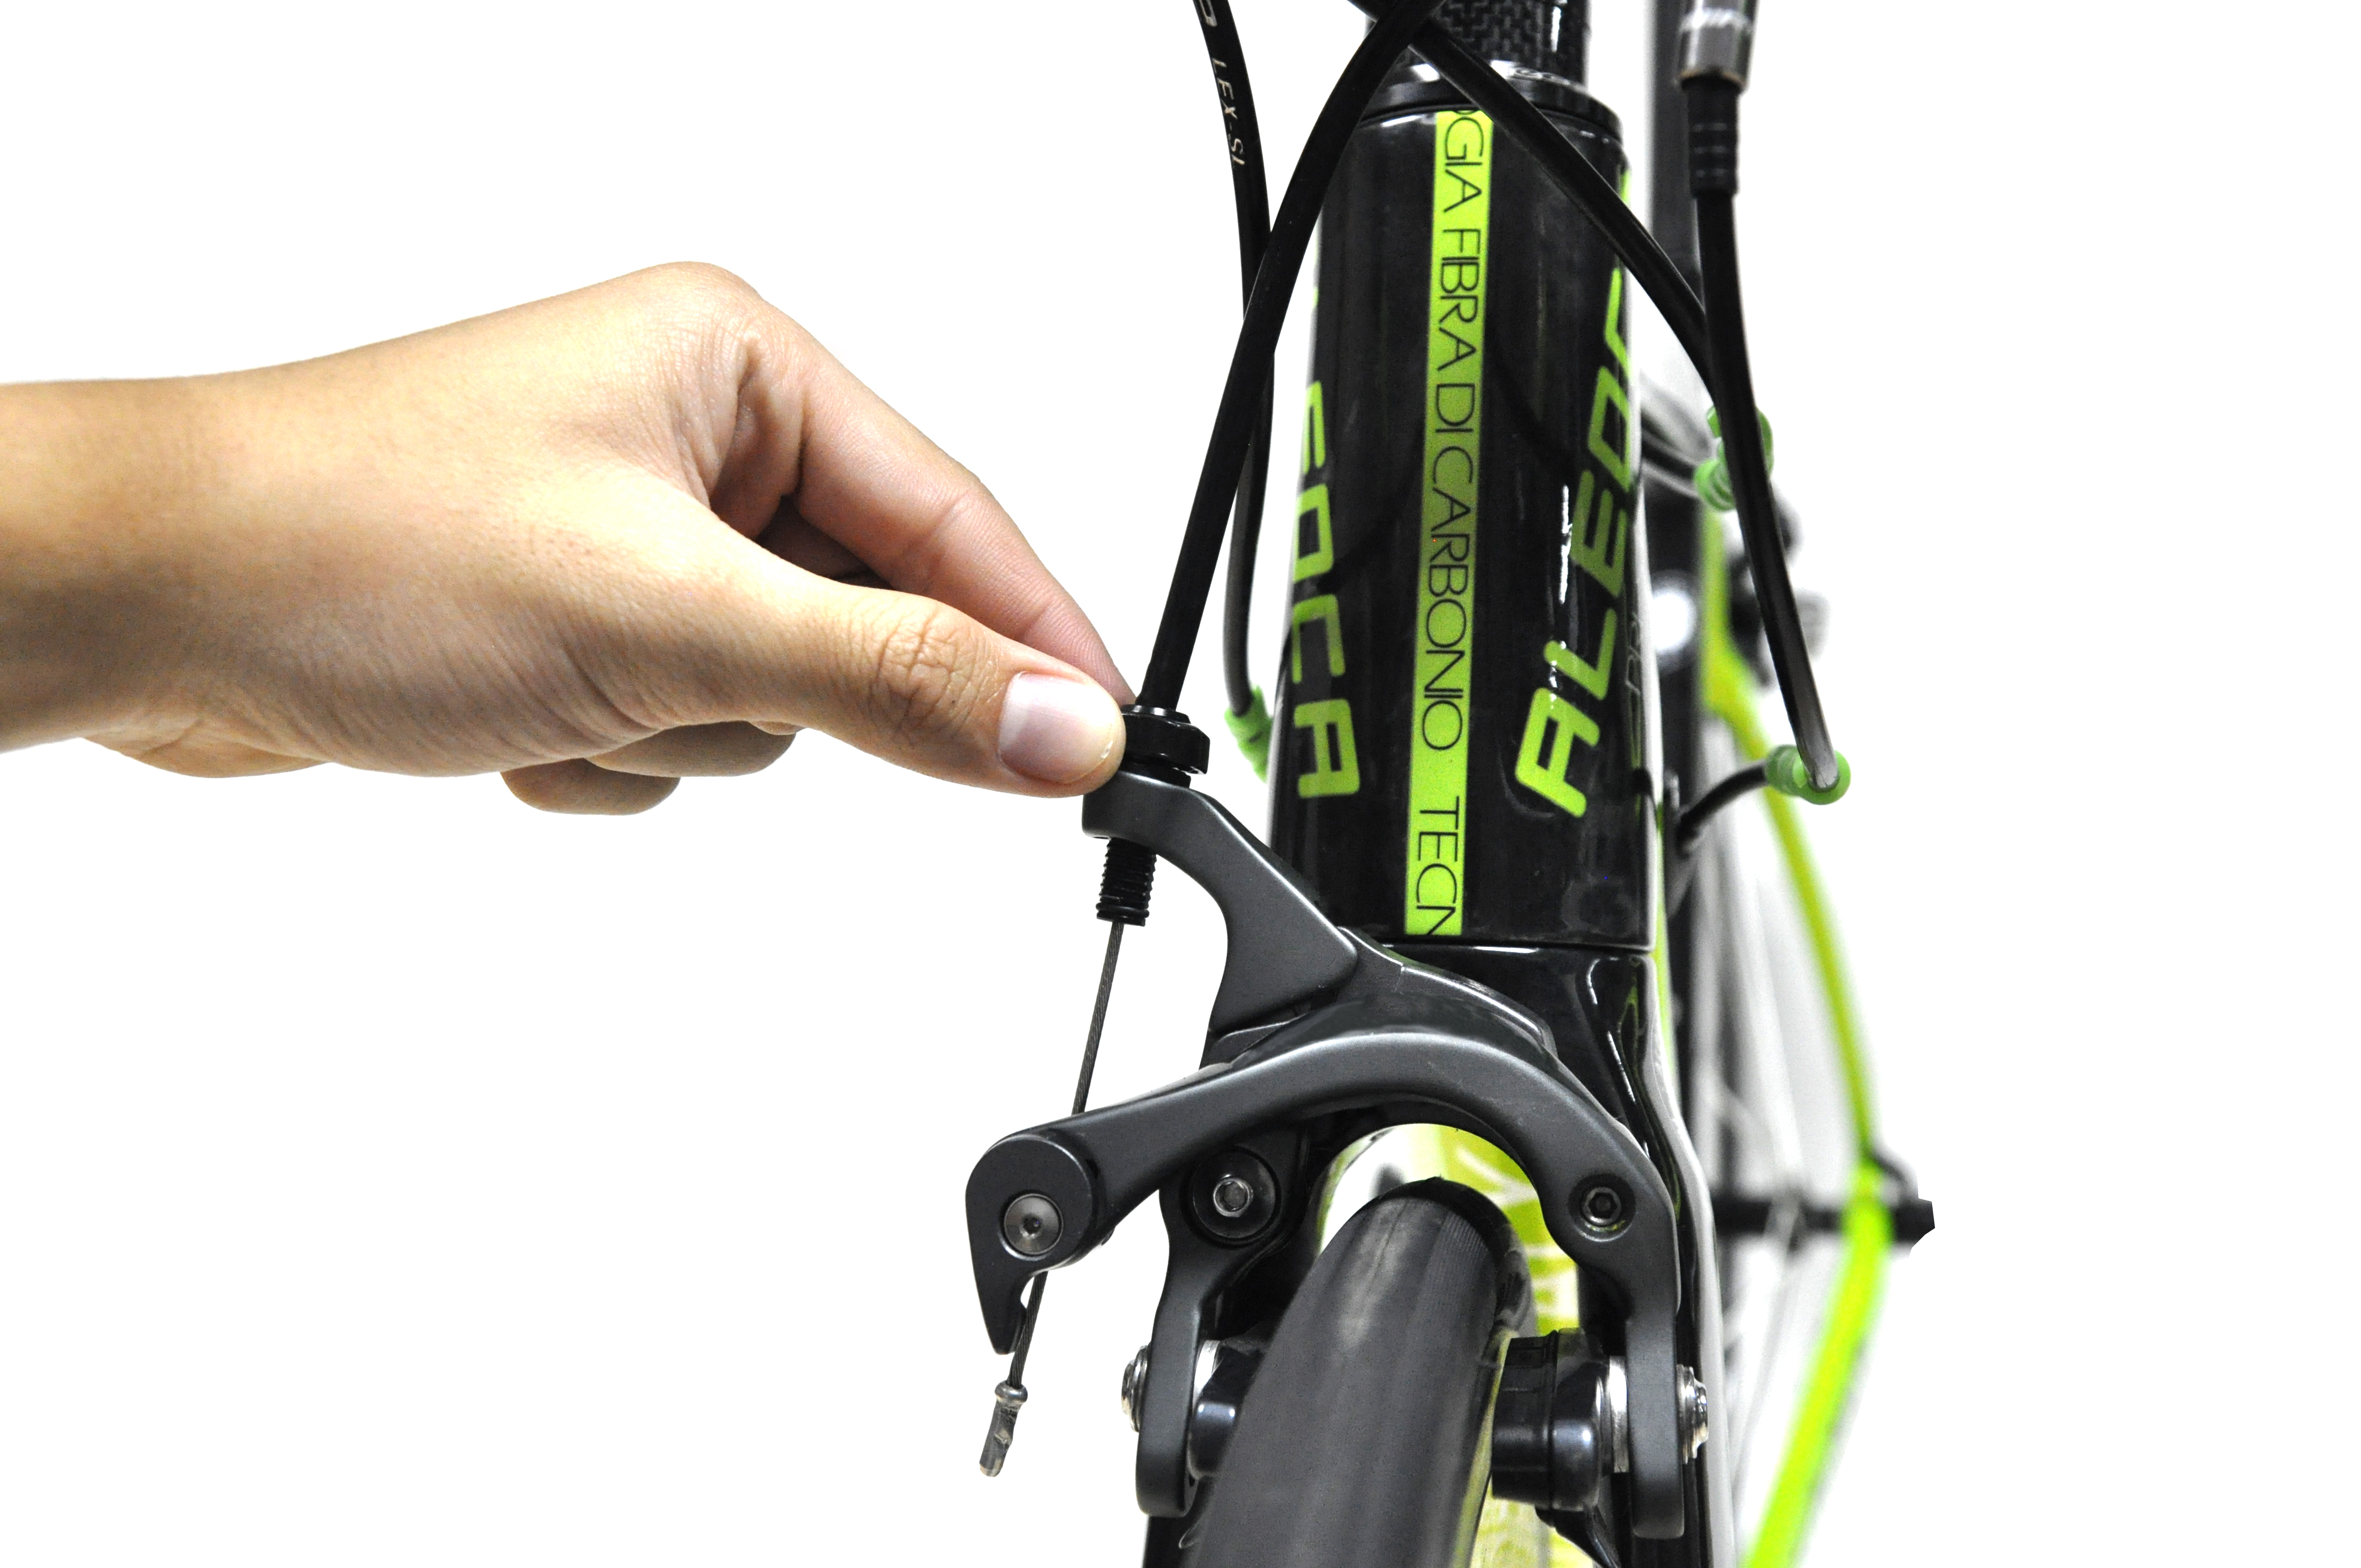 Turning the barrel adjuster anticlockwise (upwards), will bring the brake pads closer to the rim.
Turning the barrel adjuster clockwise (downwards), will bring the brake pads further away from the rim.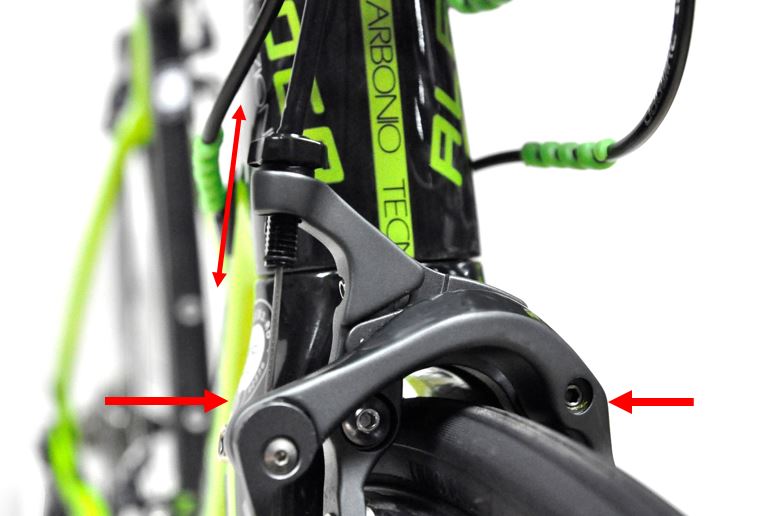
Increasing Cable Length (Major adjustment)
For major adjustments to cable tension, you will require an Allen key to change the length and tension of the cable.
Loosen the bolt that is holding the cable by turning it anticlockwise. This bolt is found near the quick release lever.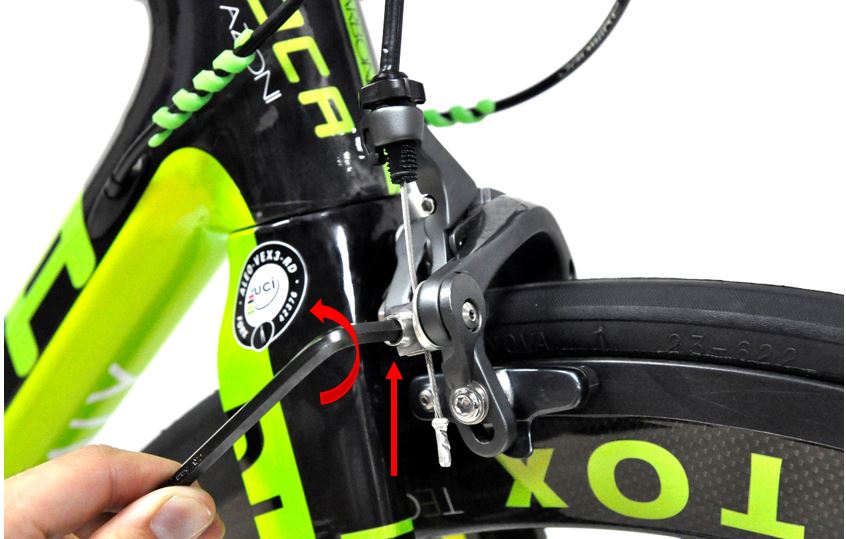
Once unscrewed, use your hand to manually depress the caliper brakes evenly. Bring both brake pads to the desired position. There should be even spacing between both sides of the brake pad.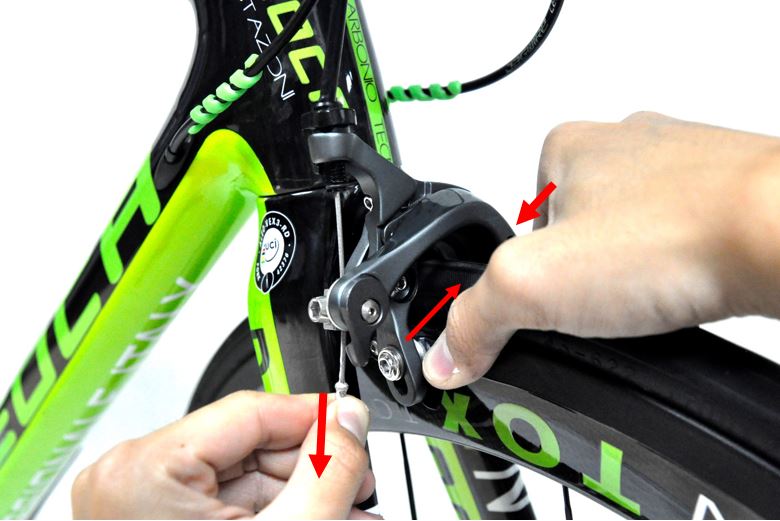 Hold the brake calipers at the desired position and tighten the cable bolt by turning it clockwise.
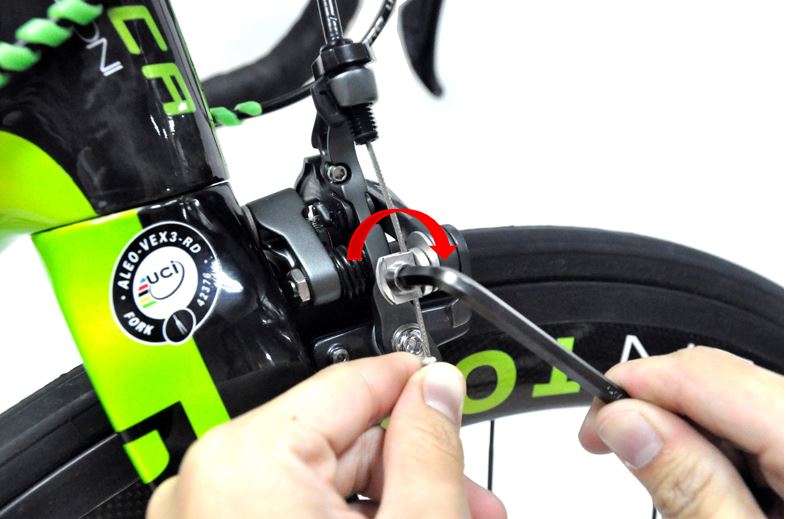
Test the sensitivity of the brakes to determine if the cable tension is sufficient or too much. As a guide, it is recommended that the brakes should be engaged when the levers are depressed half way. This will affect your braking time needed when slowing down during riding.
Step 3: Fine tune adjustments
Centering Screw
Tuning the centering screw on caliper brakes will make finer adjustments to the brake calipers. It is important for the brakes to be center so that braking will occur evenly on both sides.
Different models and manufacturers may have centering screws on different parts of the caliper. Some screws may require a Phillips head screwdriver and others may require an Allen key to adjust. 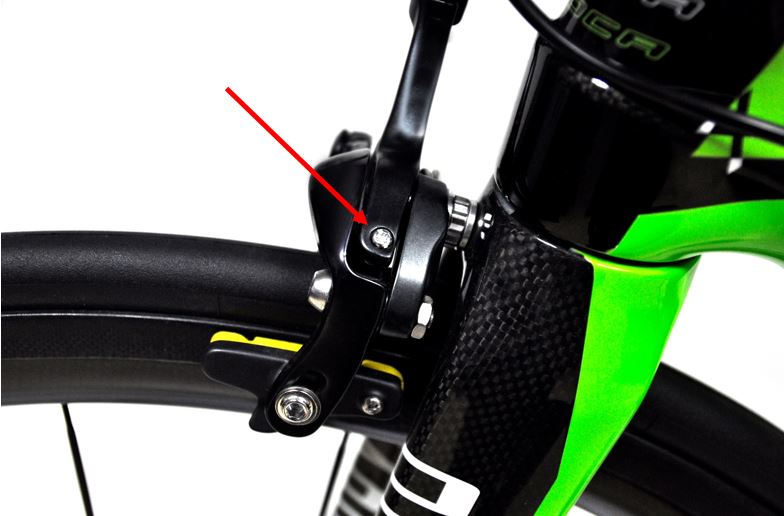
View the brake pads from the center of the rim. If the right brake pad appears closer to rim, tighten (clockwise) the centering screw.
If the left brake pad appears closer, loosen (anti-clockwise) the centering screw.

Always make small adjustments at a time and observe the change in the brake pad positions. Being precise will result in more even and safer braking.
Check that all bolts have been fastened and that your brakes are in tip-top condition before going out for your ride!