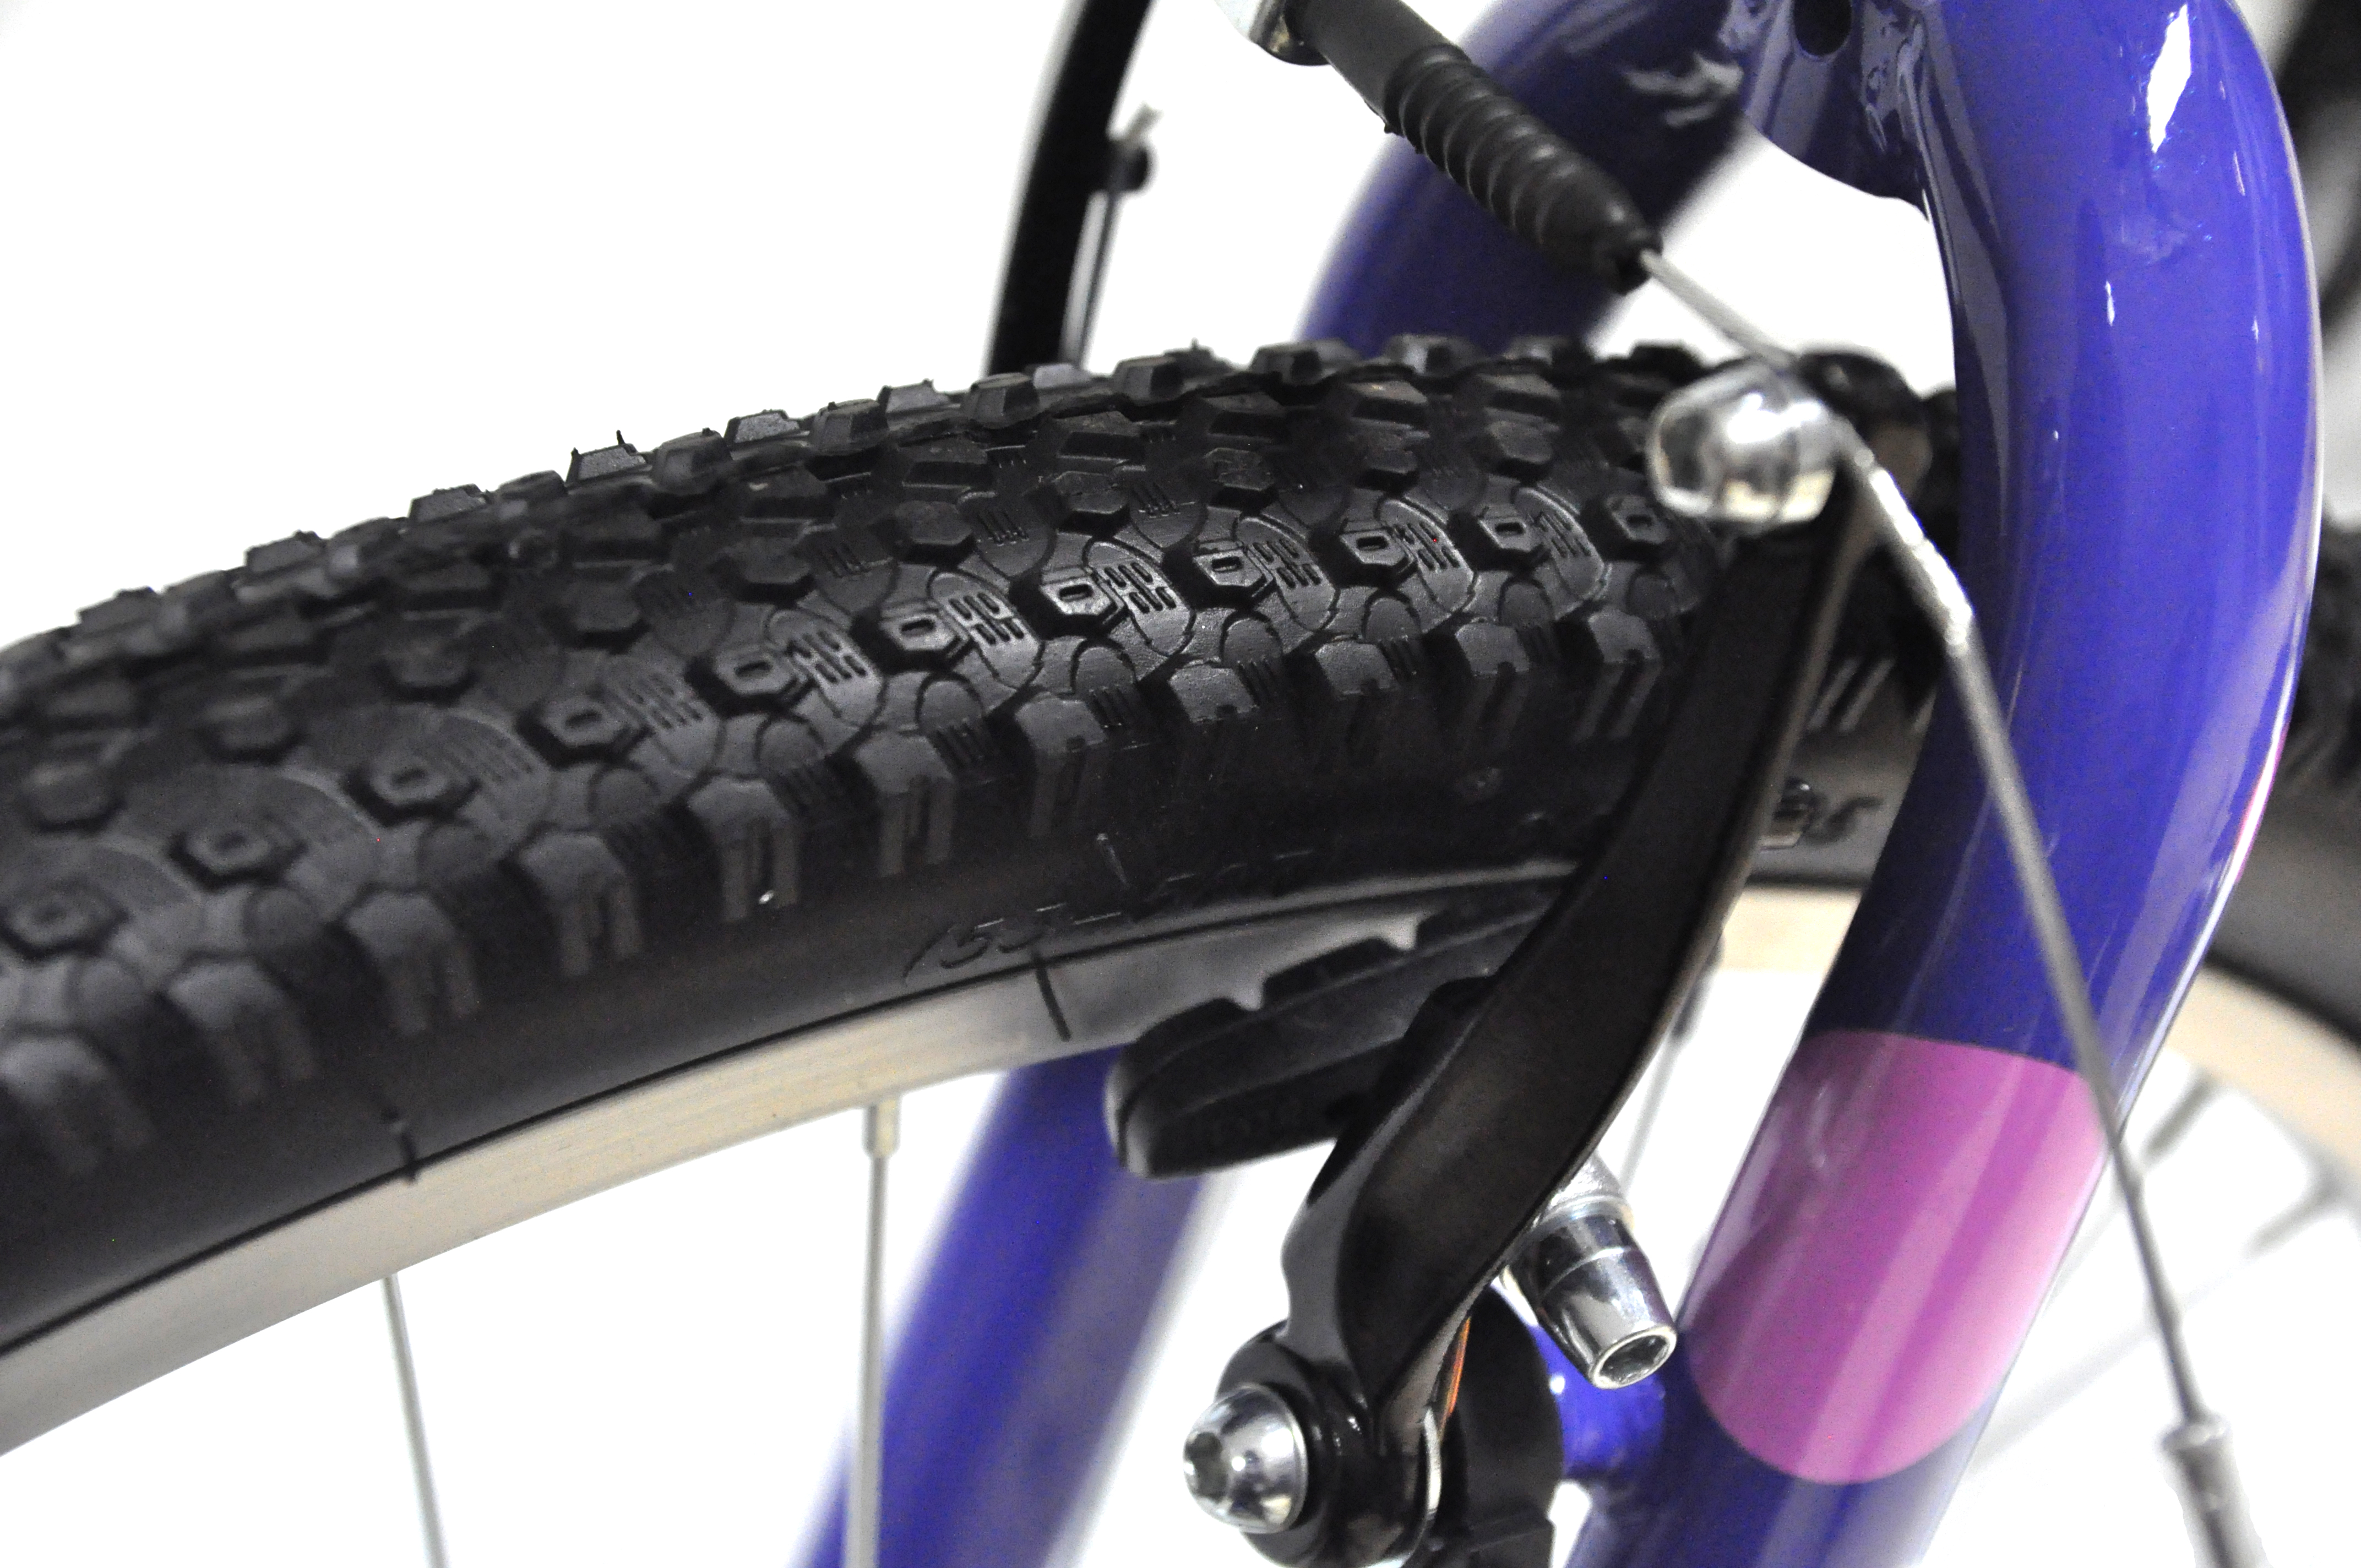
 V brakes, also called ‘direct pull’ brakes, rely on the upward pulling of the brake cables to pull the brake pads into contact with the rim. Commonly found on most mountain bikes, it is important to tune the tension of both sides of the V brake, so that even braking occurs from both sides of the brake pads.
 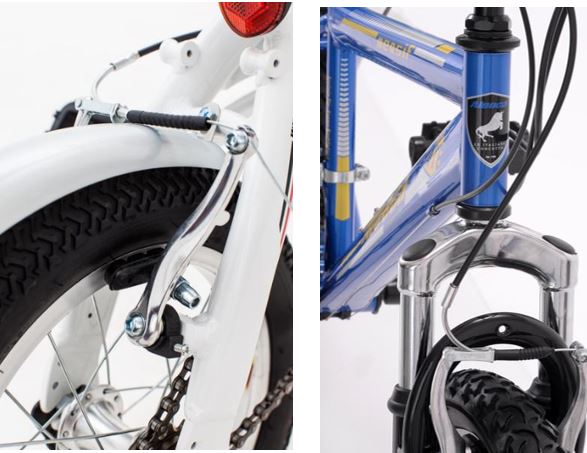 (Left) Shows a V-brake on an Aleoca foldable bike, (Right) on a hard tail mountain bike.
This post will list the different parts of a V-Brake and also include step by step instructions on how to tune and maintain your V-Brakes.
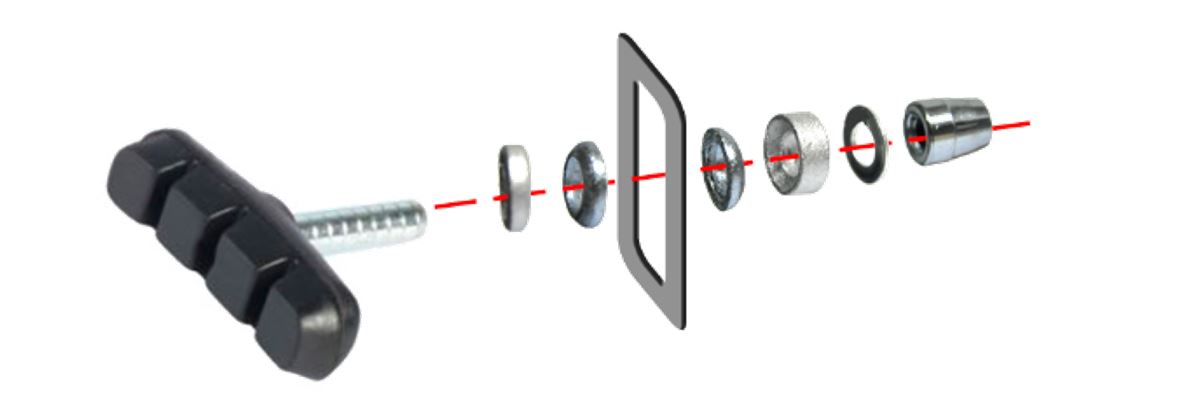
Parts of a V-Brake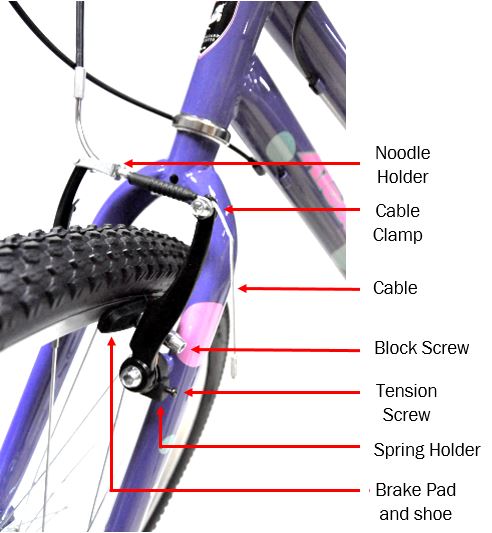 How they work:
Common issues with disc brakes is that overtime, the tension adjustment becomes uneven and hence either side of the brake pad starts rubbing on the edge of the rim. V-Brakes may also lose their cable tension which will cause a loss in braking power.
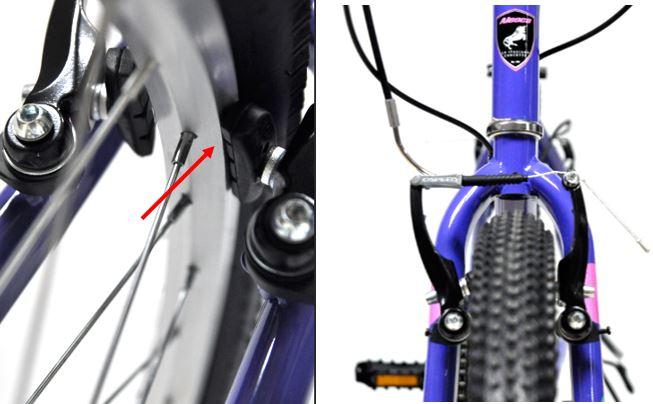 (Left) Shows the right brake pad rubbing against the rim. (Right) The frontal view easily shows the V-Brake unevenly slanted to the left.
The following step by step guides with images will help you:
– Adjust the brake pads properly
– Adjust the cable wire
– Set the tension adjustment for both sides of the brake
Step 1: Opening the V-Brake
This step allows you to remove the wheel (if necessary for other tuning), and will make adjusting the brake shoes in later steps easier.
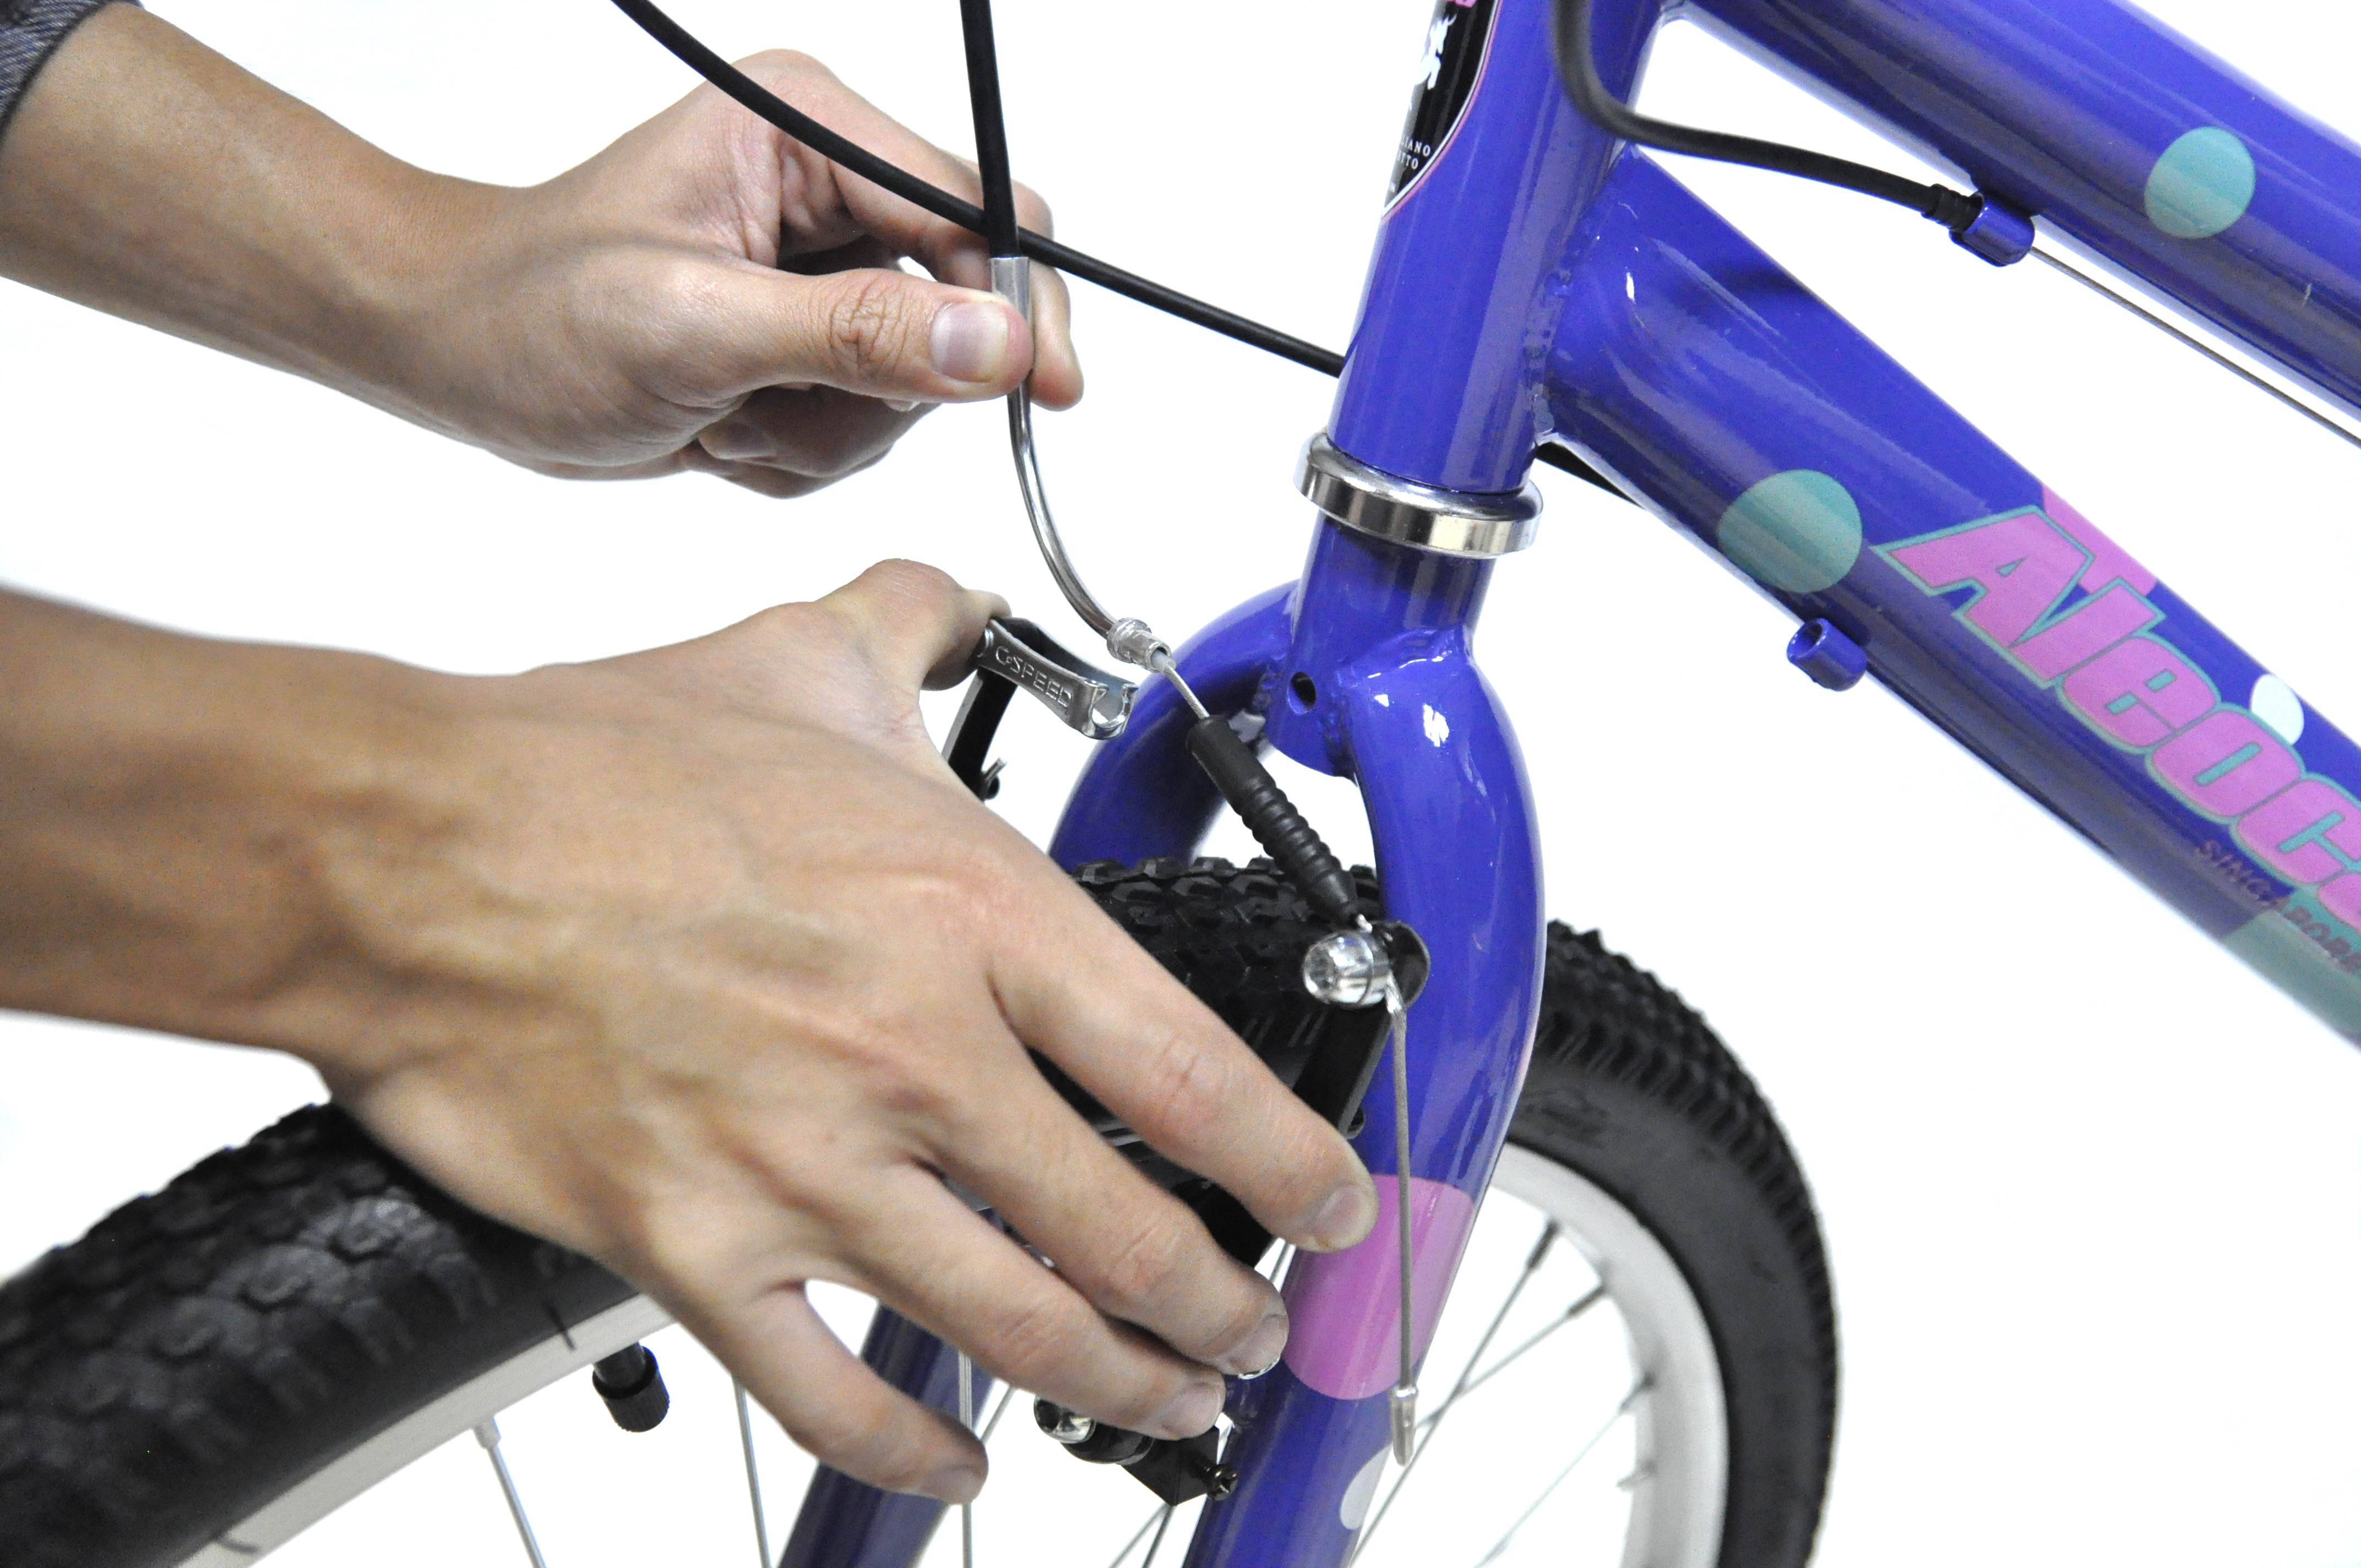 Press both brake arms fully with one hand so that both brake pads touch the rim. Using the other hand, unhook the brake cable out of the noodle holder by pulling it outwards of the holder. Once the brake cable is removes, you may release both brake arms. The brake arms will now be able to spring outwards more which will make adjusting the brake pads easier.
Step 2: Adjusting the Brake Shoe position
This step makes sure the brake shoes are in line with the rim, so that braking is consistent and effective.
 The image above shows a brake pad that is out of alignment.
Before making any adjustments to the brake pad, first ensure that it has been assembled in the correct position: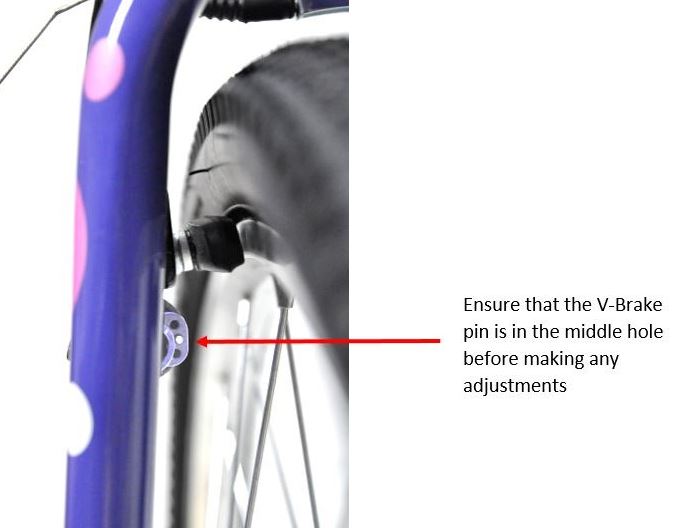 The brake shoe should also be assembled in the following manner on the brake arms. Take note of the direction of the rounded bolts of the brake arm.
 To loosen the brake pad for alignment, use an Allen key and turn it anti-clockwise to loosen the block screw to allow movement. Alight the brake pad so that it does not touch the tire and is perfectly touching the rim.
It is important to apply pressure to the brake arms onto rim with support on opposite side (so that rim does not lose center). At the right position, turn clockwise to pre-tighten (do not tighten fully) the block screw.
After pre-tightening the brake shoe, hold the brake pad individually and tighten it by turning clockwise. When tightening, ensure that the brake pad does not shift and lose it’s position.
Step 3: Adjusting the cable wire
This step will help tune the sensitivity and engagement of the brake levers by adjusting the cable wire.
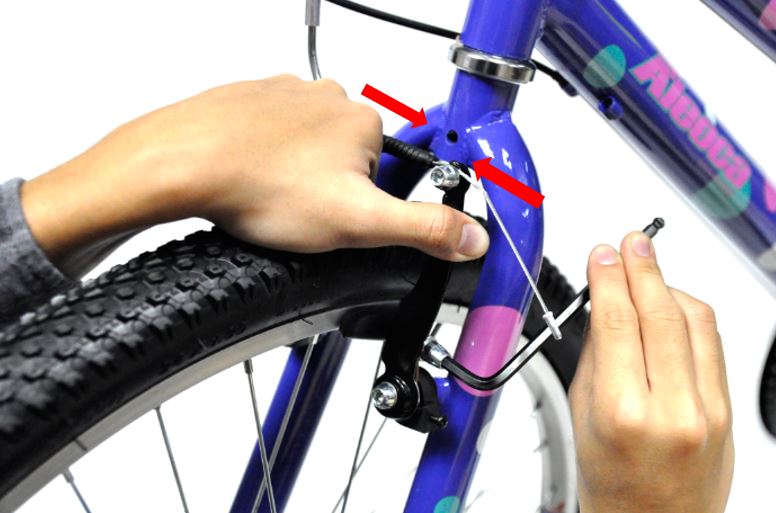
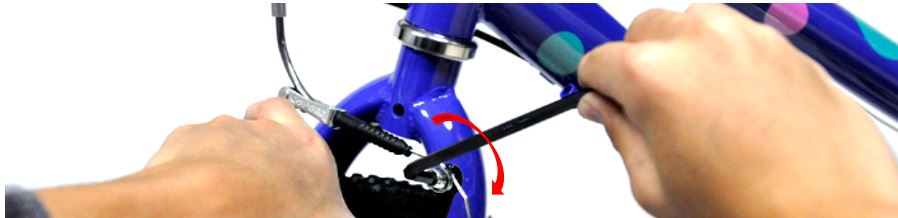
First, hook back the cable noodle (opposite of Step 1). Unscrew the cable clamp screw by turning anti-clockwise using an Allen Key. 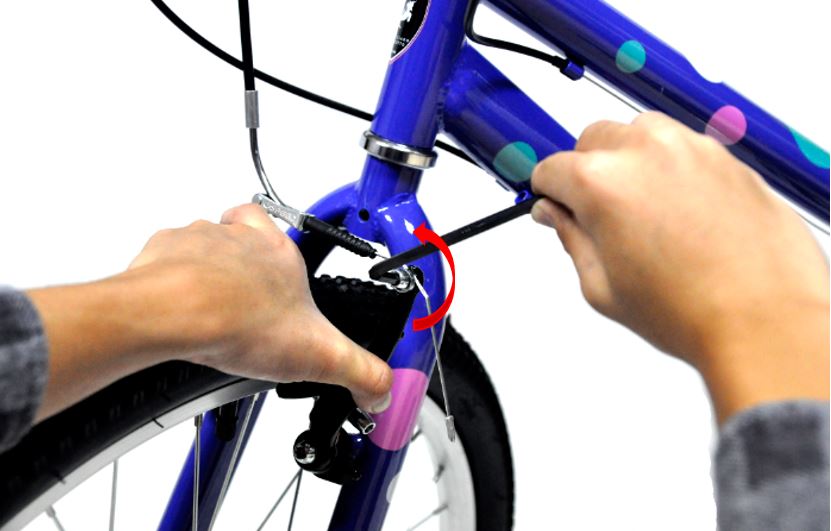 Pull the cable wire outwards and taught. Pre-tighten it slightly in order to test the sensitivity of the brake lever engagement.
To determine how much cable wire needs to be pulled taught, depress and observe the engagement of the brake levers. As a gauge, the brake levers should not be able to be depressed all the way. It is recommended that the brakes should be engaged when the levers are depressed half way.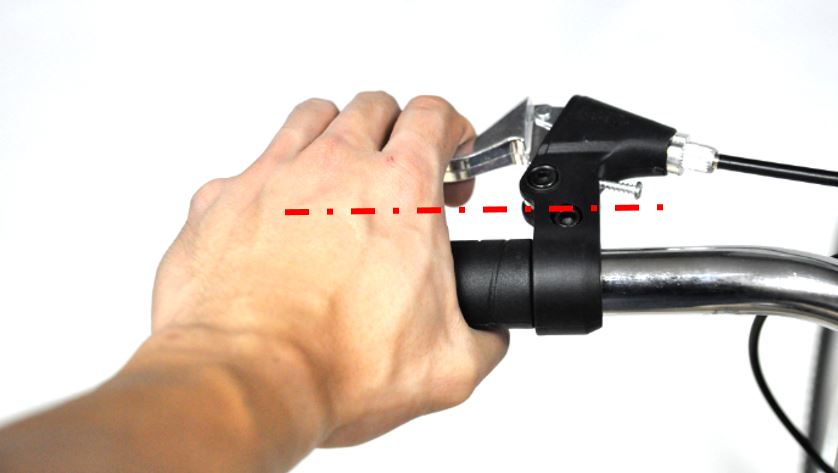
 Once the cable is pulled to it’s desired length, tighten the bolt screw by turning it clockwise to hold the cable in place. Do not over tighten the screw as this may damage the cable wire.
Step 4: Adjusting the spring tension
This final step will involve adjusting the tension screws to balance both sides of the V-Brakes.
Tightening/loosening the tension screws will make each side of the brake spring back farther (outwards) or nearer (inwards). Before adjustments, determine whether the spring holder (where the screw sits) for your bicycle model are made out of plastic or metal.
If it is made out of plastic, the tension rod must be unhooked before tightening the screw. This helps prevent wear to the threads during adjustment.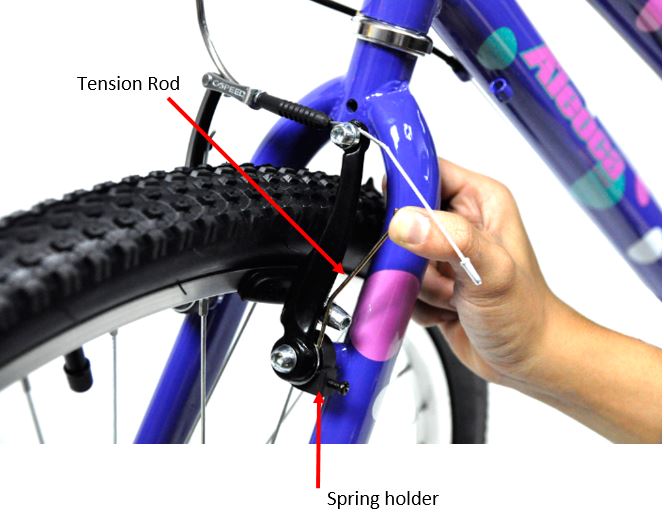
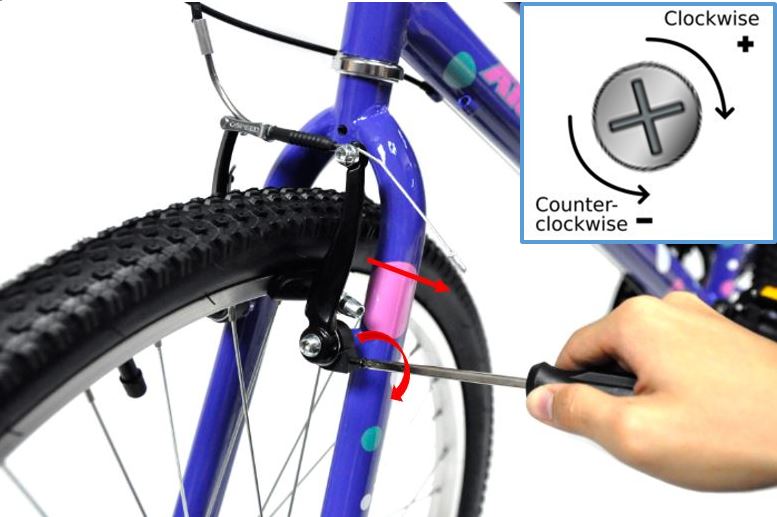
Tightening the screw clockwise will increase the spring tension, and will make the brake pad spring outwards.
Loosening the screw anticlockwise will decrease the spring tension, and this will make the brake pad move inwards.
Adjust the tension on both sides so that the brake pads are evenly spaced and move equally when the brakes are applied.
A properly adjusted and evenly balanced V-brake should look like this: 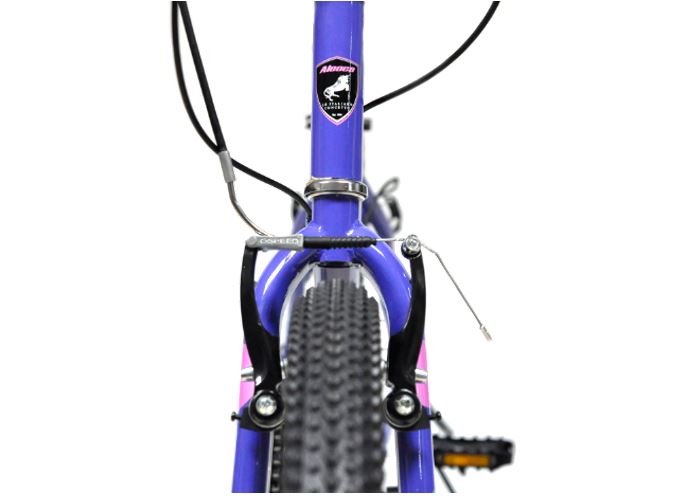
Always remember to fasten all parts securely and test your brakes before going out for a ride!